


This is a FREE and EASY project that I’ve been meaning to do for a long while. Years, actually. I have no idea why it took me this long, because it was really, really, really, really, really, really, really, really, really easy.

I had a collection of glass vases left over from our wedding. They were used for our centerpieces.

When was our wedding? Three years ago. These vases languished in a storage box for THREE YEARS.
Four vases are now rescued and the rest are sadly left behind…for now.
The four vases that I chose for this project:


You probably should use enamel paint that’s designed for glass for this project, but I used latex paint from the 382 sample pots I have on hand. I’m not worried about painting peeling off because I don’t plan to put anything inside these vases. These will be purely for looks.
I have paint samples in many different colors, but I really liked this photo that I saw on Pinterest and wanted to keep all the vases in the same color family:

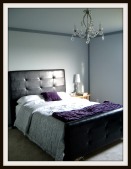
These vases will hang out in our Expedit in the game room once they’re good and dry.

They look so much better painted! The one on the left is sporting a very light gray shade (it looks whiter in person) that we considered for our living room back in the day, but passed over. The middle one is proudly wearing a Scrub color, but it looks so much better on her than on our laundry room walls! The left one is also painted with another laundry room reject. It looks a little more teal-er in real life, not so gray.
Paint colors: Sherwin Williams’ Site White, Martha Living’s Araucana Teal, Benjamin Moore’s Mount Saint Anne.
For the vases with crazy shapes, I went with more subdued colors and had fun with bright colors for vases with more classic shapes. I think it’s a good strategy!
I wanted to experiment with tape on the 4th vase, so I grabbed some green tape and tried to tape a simple border just below the rim, but it didn’t work out. The tape was hard to apply since I was taping it inside the vase and it just wouldn’t go around in a neat band. So I just let the tape do its thing and the ends met up alright in the end.

Something different, I guess?
I decided to show you the progress while painting this vase. I didn’t use a paintbrush or anything fancy… I just let gravity do its magic. (Paint color: Sherwin Williams’ Calypso, briefly considered for our office and rejected because it was too bright)

I protected the countertops with some foil – much more neat than paper towels.

This is the fun part.

And then the light flashed! You can see the light plugged in the outlet just behind the vase. That light is SO annoying… it flashes like a fire alarm. I hate it. But it lets me know when Janella is crying.
So I had to stop the… ah, see? The light just went off. Speak of the devil. Hold on.
OK, I’m back.
After attending to the little queen for around an hour and half…

“Look, ma! Two teeth!”
I finished swirling around the paint only to find a few splotches:

This was caused by the paint drying before I could finish it. Luckily, it was easy to fix – I just wiped off the splotches and spread around the paint again and voila!
However, I don’t think the tape will work out…

It seems like it leaked through in some spots. Nick says the leaks will give it “character”. I think that’s a great way of looking at things. That giant scratch on the dining table? Character. That stain on the rug? Character. A spot in the carpet that has been scratched up and destroyed by a certain cat? Character. Baby spit-up on the sofa? Character!

Well, come back in a week to see how this project pans out. The paint isn’t dry yet. There’s actually a lot of paint at the bottom of all the vases and I’m waiting for them to dry… it might take a while. Cliffhanger!
A few tips:
– Do this project only if you already have some glass vases and sample paint pots laying around. If you’re going to buy supplies for this project, get enamel paint for glass and get glass vases for 50% off at Hobby Lobby, please. *EDIT* Go to the Dollar Store instead! $1 each, can’t beat that.
– Don’t get interrupted by a baby.
– Do all the swirling in the vase at once, before paint dries. Then pour out the excess paint immediately. I didn’t, so it’s taking forever for the paint to dry.
– Don’t use a paint brush (or your finger!) to spread around the paint – they can leave marks on the inside that will turn you off if you peek inside. Just swirl it and the paint will level out by itself and look SMOOTH and professional.
– Bold colors for simple shapes, calm colors for crazy shapes.
– Don’t use these vases for anything – no flowers, no rocks, no nothing. They’re just for looks.
Despite the mistakes I made and some imperfections here and there, I really love these vases. When they were just glass, I had no use for them… and now I can’t wait to really decorate the Expedit with these vases. And the other vases that I have will be painted in other colors for other spaces in the house. Fun, easy, and FREE!
If only all of our projects were like that…
I first got the idea when I saw this at Sugar and Charm through the magic of Pinterest.
Filed under: Before & After, DIY, Paint: The Enemy (and best friend), Tutorials/How To | Tagged: enamel paint, glass vases, latex paint, paint colors |


Love them! I hope your taped one turns out. Can’t wait to see it. I have similar vases sitting on a shelf in my garage because, like you, I have no use for them. Perhaps they will now have a new found purpose. And I have a TON of paint lying around!
– Lisa
Do it! It literally takes minutes to do!
Definitely pretty! and looks easy enough for klutzy me to do, yayy! When I checked out the Sugar and Charm- *gasp* they used glass vases from Dollar Store- brilliant! 🙂 I love the scrub-colored one! Thought your game room was in scheme of green, though?
Yes, green! Along with blues and teal.. to go with the colors of the office and the laundry room 🙂
And you’re right, glass vases from dollar store! Wonder if they’re $1 each? If so, that’s a great deal!
Yes, they are $1 each! Go there, not hobby lobby!
Beautiful!!!!
Very cute! I have a few vases that would probably love a similar makeover!
Reblogged this on theforeverremember.
I think I’m going to do this soon, I have lots of plain boring vases and sample jars!
Love the colors!
Wow, they look a gaziiiiillliiioooon times better painted! I have vases like that sitting around too, I am totally going to do this. Love this! And pinning it!
What a great, simple DIY. Love it. Aren’t you glad you saved those vases.
They look awesome, and I love that you just used leftover latex paint – I have oodles of that on hand for sure! I did this same process with plastic Christmas ornaments but in the end most of the paint wound up draining out of the ball (if that makes sense) and leaving the ornament streaky – but that didn’t happen to you! Sigh. I will have to try it again. 🙂
First off – Janella is SUCH a little peach! And I really like this project! Very fun. And, although I can see why the blinky light could get annoying… That’s really an awesome thing to have 🙂
Have any pix of the taped vase yet?! Can’t wait to see it!
could u teel me what paint it is ???did u mixed the glue???
It’s just regular latex wall paper. I didn’t use any glue!
My brother recommended I might like this website. He used to be entirely right.
This post actually made my day. You cann’t imagine simply how so much
time I had spent for this information! Thank you!
Is it safe for your plants or flowers? Do they chip off?