How Electricity Ruins Everything

Well, I promised you that I would be back today with an awesome addition to our laundry room. Unfortunately, my plans have been thwarted by dumb electricity. I mean, who needs electricity in the laundry room? Don’t we all wash our clothes on a washboard?

Basically, the area where I planned to drill in some screws is apparently filled with electrical lines. Or so says my stud finder. I’m still hoping that it changes its mind, but no luck so far.

Let me just tell you about my plans because I still think it’s a cool idea and maybe someday America will lose all power and I will finally get my chance to achieve my dream. One can only hope…

A few months ago, I saw this very cool home at Brick House that had this clever solution for hanging up clothes sans closet.

Pipes! I loved how industrial this looked and I knew it would be a great solution for our laundry room (not).

Later, I stumbled into this adorable nursery at Apartment Therapy and gasped (in my mind only) when I saw this photo:

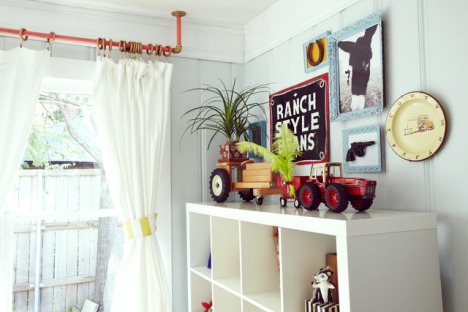
Pipes, painted coral and gold, holding up curtains? SO COOL.

I’m sad just thinking about it. I tried moving it in different configurations and using two different pipe sizes, but I just couldn’t find a way to make it work and have it look good. I’ll find another way to hang up wet clothes, but I’ll also have to find another use for my pipes and floor flanges.

IMG_3100

(I also have a third pipe. Bigger than these two and just as useless.)

My cool clothes hanger was supposed to be installed below the small cabinet on the left:

IMG_3194

Oh well.

I’ll need to find another use for my pipes. Perhaps they can become legs for my jewelry cabinet, a la Brick House’s dipped legs.

Fortunately, a little elfin worked very hard to cheer me up today.

silly baby

The Story of the Headless Teal Lamp

Remember my spray paint mania? Well, it’s still going strong.

I ended the last post with this photo as a hint…

lamp in living room

I thought it was really obvious but nobody guessed it correctly!

I’ve had these headless lamps for a long time now…

They are beautiful and a smoky purple color. I bought them for our master bedroom, but the side tables we got later on were too small for these lamps.

So they were just hanging out in our office, doing nothing.

We had nowhere to put them. I thought they would work in our living room, but they added absolutely nothing to the room. The room needed more COLOR other than yellow and the lamps just didn’t do the job.

We looked for a great pair of teal or blue lamps, but couldn’t really find anything we liked or in our price range.

And so… you know what’s coming.

glass vase waiting to be spray painted

Yep, I decided to experiment on one of the lamps and spray painted it the same teal I used on The Thinker!

At first, it felt crazy to be spraying such nice lamps. But they were lamps we had no use for. And they were pretty inexpensive — we got them from Target. Instead of buying another pair, why not just use what we have?

Tape off the top and the cord. Prime it. And then… TEAL SPRAY PAINT TIME.

use blocks to keep lamp from falling over

I carefully covered the lamp with several layers of thin coats. I wanted it to be perfect. Near the end of all that layering, I needed to spray the bottom of it, so I turned it over but it wouldn’t stop rolling over. I was paranoid that I would come back into the garage to find the lamp broken and crying after falling off the box.

I added two little wood scraps on both sides to keep it intact. The lamp didn’t fall off, so I guess it worked!

teal lamp

I can’t believe how grainy this photo is. It can get dark in the living room when all the shades are pulled down and most of the time, they are, because the houses next to us are too close for our liking. We will need to add frost to the windows to give us more privacy, and then I will keep them pulled up much more than I do now.

But anyway. Look at the teal lamp!

teal lamp

Remember, they’re teal, not blue like they seem to be in these photos. Cameras hate teal.

The teal lamp just works beautifully in the living room. It adds COLOR and LIFE – two things our living room needed. Now, with the addition of some colorful pillows and some more color touches here and there, it will all work together.

Okay, let’s talk about the lamp shade. In the photo above, it looks great and white. But in real life, it was kinda loose and flimsy and when the light was turned on, it looked sickly yellow.

The lamp shade is from Target as well and I was so excited to finally have heads for the headless lamps, but I hated them so back to the store they went. And I will never (never say never) buy a lamp from Target again, because it is so hard to find decent compatible lamp shades for them.

Here’s why:

kinds of lamp shade types

graphic from LAMPS USA

Most lamps require a spider/harp fitter shade, but Target lamps use slip UNO fitter shades. Then what happens? You tear your hair out when you can’t find a cute slip UNO fitter lamp shade for your stupid lamp.

I did some research to see if I could convert the slip UNO fitter lamp into a spider/harp fitter lamp. Behold.. this tiny apparatus.

Slip Uno Adapter Harp Converter Lamp Shade Uno Euro Fitter

It’s called a slip uno adapter. The amazon description explains it well:

“Slip Uno adapters are made to fit directly over a plastic lamp socket found on lamps usually purchased at places like IKEA. This adapter will then let a harp attached to it. Then it will allow you to use nearly any replacement shade on that lamp. This is meant to be an alternative to the lampshade which has fitter already attached to it. You can now easily attach a harp to a lamp without one.”

Cool, right? But it costs $10. Yes, $10 for that tiny thing. Plus $4.18 for shipping. Then I will also need to purchase a harp and then… the reason I’m doing all of this work… a lamp shade.

*EYE ROLL*

I did some more research and one website (HERE) calls the little circle thing a “saddle” and says it should be 50 cents. What? Really? That sounds slightly better.

I’m going to make some calls to local lamp shops and let you all know how it works out. If you have any tips, bring them my way! Otherwise… give me good vibes.

Closing off this with a cute little Instagrammed photo of the lamp! Yes, we finally got a iPhone and hell didn’t freeze over. As far as I know, at least!

teal lamp

How To Snag Overly Big Lamps at Home Goods

1. On your way to check out the piles of baby stuff at Buy Buy Baby, stop by Home Goods to check out the… goods.

2. Be obsessed with finding the perfect lamps/sconces for your bedroom and go straight to the lamps area.

3. Find great lamps for $39.99 each and consider paint spraying them black. Go ahead and buy them and hope they look good in your bedroom.

4. Set them on your nightstands the minute second you get home.

5. Stand and stare at them (a la Emily Henderson) for more than several minutes.

6. Sadly mutter to your husband that you think they might be too big. Listen to him disagree weakly.

7. Decide you’ll give them a few days to prove themselves worthy.

8. Tuck yourself in bed that night and flinch when the lights shine brightly in your eyes as you chat with your husband.

9. Sigh. Look at your husband as he comes to the realization that they are indeed too big. Sigh again.

10. Decide to return them. Procrastinate until the second to last possible day that you’re able to return them.

lights edited

They don’t look too big in the picture, but in person, they just overshadow the headboard of the bed and the nightstands. Oh well. I’m sad to have to return them, but I’m happy to announce that Nick is finally on board with the desk lamp/sconce look for our bedroom. Hopefully we find the perfect pair for cheap somewhere soon or settle for one from our previous search (see this post).

But no trip to Home Goods is a complete and total fail. I love these huge outdoor pillows that will live happily in our nursery.

pillows edited

And how do you like this cute yellow birdcage thingy?

birdcage2 edited

It reminds me of this birdcage from Crate & Barrel, but at 1/3 of the cost.

Okay, fine, they don’t look similar at all. But – both are yellow. Both are birdcage-ish. And ours is much cheaper. So, let me be happy, a’ight?

Best off-the-point news of the day: THREE WEEKS ‘TILL SUMMER VACATION!

Marble (or at least, marble-ish) Lamps.

The latest Lonny showcased many good things, including this great marble lamp that you can buy from Furbish.

As I gazed lovingly on this lamp, I realized that it looked a bit familar…

Ah yes – we recently purchased two of these lamps from HomeGoods:

Kind of? Like a cross between marble and peacock?

I really, really like them by themselves, but they are just meh in our living room. They don’t stand out – the mirror and the window shades steal all the attention. Plus, it kind of annoys me that the shade isn’t as white as the side table.

I think we will return them… don’t you hate it when you really love something but it’s just not right for your space? Good thing HomeGoods has a 30-day return policy. I just gotta remember to return them before time’s up!

I’m looking for something striking AND colorful, maybe something like this:

Or this, but less expensive:

I don’t know. I feel like it’s hard to buy lamps. Especially colorful ones. So many beautiful ones out there that are priced over $100 each – I don’t feel like forking over that much. We got these fab green lamps for $50 each so I still believe we CAN find the perfect lamps for our living room for a great price. Am I dreaming?

Serious Dilemma: The Windows

Seriously, now. Come on, now. Enough.

I’ve been hemming and hawing over them stupid windows in the living room and the dining room. Am I going to let four windows break me?

We’re still living with ridiculous white plastic blinds, now all destroyed by our then-kittens, and STILL slummin’ it with a cardboard cover on one window.

We found fabrics we liked for our planned DIY window shades, but we were paralyzed because our DIY window shade wasn’t holding up very well. We weren’t going to purchase expensive fabric for a bunch of droopy window shades. Then I found this great tutorial (can’t find it now) about how to glue fabric to a white roman shade, but it is a big risk. Fabric is expensive and I don’t know how long this would last.

We then thought, maybe, let’s do the bamboo blind and white curtain combo? Very popular in blogland and a classic look.

Did the math and it came to around 388 dollars for plain blinds and white curtains. Hmm.

Played around with a photo from Overstock – added the gray walls, removed the white trim from the windows.

I could use patterned curtains, like these curtains I really like from West Elm:

I dunno about this look. Remember, I’ve been thinking about this for MONTHS so my judgment is seriously flawed. Tell me what you think. I just am not sure if it would work in our home.

Then I saw this picture at MFAMB:

This elicited a LOVE!! reaction from me that bamboo blinds and white curtains just never did.

And Nick says NO MORE DIY PROJECTS BECAUSE YOU NEVER COMPLETE ANYTHING. I told him, it’s going to be expensive to not DIY it. He said FINEEEEEEE.

I am going to remember this trick.

So, I am currently researching our options. I think we want patterned flat roman shades – something geometric or Moroccan, something like in the picture above – in white and gray.

It’s been hard finding sources. Why?

So far, the best thing I’ve found is this:

From the Shade Store.

Calico Counters also does custom roman shades, but I haven’t seen any fabrics there that I love for this purpose. I emailed a few fabric stores asking for price quotes. Do you know of any other custom roman shade sources?

I just can’t stand looking at destroyed versions of this any longer. It’s serious. If you do a google image search of “destroyed plastic blinds” the first picture you get is OUR WINDOW BLINDS! Evidence below.

Oh my gosh. That fourth picture looks familiar, too…

stuck in a color struggle

Suddenly, we went from “WE LOVE GRAY LA LA LA” to “Do we really want another gray room?” to “Maybe gray is best..” to “I don’t know what to think anymore!” to “Gray is kind of pretty and neutral.” to “WHATEVS.”

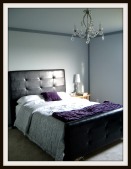
And our poor master bedroom is stuck in the middle of our struggle.

Photo taken from HERE and the colors have been changed.

I Quit Craig’s List

After getting so inspired by Little Green Notebook and her crafty Craig’s List hunting skills and Nuestra Vida Dulce’s fun Craig’s List searches in cities requested by her readers, I started stalking the website.

As you know, I got that cute desk chair — we also got more-functional-than-fab nightstands that cost only $10 each. Feeling like a master at Craig’s List, I hunted stealthy for one of the following: a cool console table for our entryway, a comfy chair for our office/library, and endtables for our living room.

I annoyed Nick more than 40 times last week, but at last – on a lazy saturday, Nick and I agreed to buy this cute-looking chair that was grayish blue with a brown trim that we planned to paint white. Only six months old, the ad said. Perfect… and only for $40? And they would deliver it for $10.

Excited, we waited and we went ahead and hung up our new mirror (TJ Maxx rocks.. more on that later) in our entryway and waited… And finally, a van pulled up.

A old, broken down van.  A van with two ratty mattresses on top. Two women came out of the van, looking tired and wearing old t-shirts. The older woman, who might be the mom, pulled out the chair from the back of her van. She put it down on the road and gestured to it, all proud.

It was dirty. And ugly. And not even grayish blue – it was closer to blue jean blue. And did I mention that it was dirty? No way this thing was six months old.

I looked at Nick, fully expecting him to say, “Please!” But instead, he said, “Okay, cool,” with a smile. Was I seeing the chair all wrong? Was it really not that bad?

I pulled out the $50 from my pocket and gave it to her. She seemed a bit shocked that I just gave the money to her. I didn’t know what to say – I felt bad that she had driven all this way here and I felt like she might have needed the money. Whatever, I’m obviously not good at bartering.

Nick and I carried it into the house and I could see the bottom of it was dirty – and there were leaves. Leaves?

I cleaned up the bottom immediately and started to tackle cleaning the upholstery, but I decided to spot test it with my favorite carpet cleaner. A small spot. When I wiped it off with white rag, it was unbelievable how much dirt ended up on the rag from a small spot on the back of the chair.

I did not want to touch it anymore. I walked to Nick and told him that it was filthy and that we would have to just reupholster it. Then for the rest of the night, I just sat, thinking what I could have done with $50 and reading blogs about other people’s decorating successes. That was fun.

But my sweet husband, the next day he agreed to go to a couple of fabric stores with me and actually got into it. We had a lot of fun looking at different fabrics and even though we haven’t found the perfect fabric for that ugly chair, I’m feeling a bit better about it now.

(I removed the cushion)

Well, not 100% yet. But I’ll try looking it as a good opportunity to practice my reupholstering skills. Well, if I have any skills. I don’t know yet. I haven’t reupholstered anything yet. Not even anything small. I hope I won’t waste a lot of money in the progress. GULP.

In all – I’m way too soft-hearted and wimpy to do Craig’s List. I think I’ll stick to thrift shops – we just discovered a really nice one last Sunday and I can’t wait to go back there…

The Bones of the Office

We have two weeks off from work (one of the many perks of being a teacher AND married to another teacher) so we were able to make a lot of progress in our office.

We started the Great Teal Office Project by assembling the large vertical cabinet for our office (you’ll see it in the pics below) and discovering that we were missing one important screw – a special screw that can only be found at IKEA. Sigh… so we drove there. Got the screw (and we also bought a few small things, we can’t just take a 40-minute drive just for one small screw, can we?).

Back home, we assembled it and then we discussed about how to put up the cabinets. Our biggest concern was something that we never realized was a big concern – should the horizontal cabinet be flush with the wall or not? We couldn’t decide just based on holding up the cabinets (and scratching up the paint in the process), so I asked Mr. Photoshop.

This is shoddy photoshop, but that is not the point of this post. So, please, Matt, do not laugh.

Option #1: Flush with the wall?

Or Option #2: A Bit Away From the Wall?

Wow, this is riveting. RIVETING! Well, it was important to us. We decided we didn’t really like both options and we stared hard at the laptop monitor for a long while. Then I said, maybe…

And I added an extra horizontal cabinet:

Yeah. Looks much better. But do you know what that meant?

Another trip to IKEA.

But good news! We got a couple of cute decor for the living room, so that was another long drive that was worth it.

After a lot of screwing, drilling, measurements, re-screwing, re-drilling, stepped-on-cat-tails, and stud-finding, this is what our office looks like now!

All the bones are up! But definitely not done. We’re trying to find a big cool map-like poster thing to go over the magnet boards, find art and other practical boards to put under the cabinet, add a small desk to the right for scrapbooking and sewing (two hobbies I hope to get going on before I turn 90), add a small loveseat for reading, and put up window treatments.

Ah, the window treatments. Something that was supposed to be done by yesterday. But. Another missing part. Sigh…

What, mom? Yes, the game room (you can see it through the door) is very messy. The office threw up all of its stuff so we could make progress here, so that’s what we’ll be doing today – going through everything and organizing everything. FUN! At least, I hope we’ll find that missing part for the window treatment… One can only hope…

Guess Who’s Coming to Dinner

We need a dining table, STAT.

54 inches. Black. Round. These are our only requirements.

(well, and it can’t cost three thousand. yes we saw a table for 3k and we said NO)

Our top contenders so far:

Click here to view larger image

Z Gallerie

Ballard Designs

We will go to a local Z Gallerie to check out the first table. It is not black, like we want, but it is a dark wood – so we will see how we like the color.

The Ballard Designs table is definitely black but we can’t check it out in person – they only have stores in Georgia and Florida. (That’s a hint, Dear Reader)

Come on! I want to find a table! I’ve been too embarrassed to invite people over because of that cheap ikea dining set from my old apt! (And yet I’ve had no qualms sharing pictures with the world on my blog… Weird.)

Bad News and Good News

Painting furniture is HARD.

Remember my jewelry drawer project? Not finished.

I did make progress, though! But the deadline was yesterday.

I say what? NO. I am not showing you what has been completed so far. It looks horrible and I think I will have to redo everything.

Maybe with spray paint. Definitely not gloss paint – it shows every beginner’s flaw. I don’t know, I will figure it out…..! I hope!!

I did get these CUTE drawer knobs, though —

drawerknobsFrom Anthropologie.

Yes, the same store I found this very cute orange chair that Nick didn’t like.

But good news!

When we were at the store, the chair was sitting there, smiling up at Nick. He sat in it. He had a straight face on.

I asked, “Do you like it?”

He smiled. “Yeah.”

It looks even better in person!

That makes me so happy that I almost forgot that I failed at my project. Almost. Ah.. I WILL FIX IT AND SHOW YOU MY SUCCESS. (even if it takes me months)

Meanwhile – if you’re hungering for some great before and afters by people who actually succeeded at their procrastination projects, click here.

Photo of drawer knob from here.