Birds in the Sky… or the ceiling, whatever.

Just because it’s been quiet around here doesn’t mean we’ve not been busy! We are making good progress on the laundry cabinets and that thing is ALMOST DONE after so many touch-ups and additions and adjustments. I hope to show you what they look like by Thursday!

For now, I wanted to show you a sweet addition to the nursery that was made by my mom. Here’s the first clue:

IMG_2582

Yes, she’s looking up with a puzzled expression.

It’s a bird mobile!

IMG_2585

My mom did everything, from sewing the birds to gluing on the eyes to cutting down the branches (bought from Hobby Lobby) and hanging it all up on the mobile. Since she did everything, this is not a tutorial but more like a “Look, how cute! And I didn’t even have to do anything except hang it up!” thing.

IMG_2586

The colors she chose are perfect – bright blue/teal, yellow, orange, with touches of black and white.

IMG_2592

Janella is in love.

IMG_2588

She stares at the mobile when she lies down in her crib and tries to grab the birds when we hold her too close to it.

IMG_2599

Yes, a bird is missing a branch. The cats did it. Tala is my number one suspect.

IMG_2607

Since our goal for 2012 is to make the house FUNCTIONAL, it’s okay that the nursery isn’t 100% done even though Janella is almost 9 months old (how did that happen?). This nursery is definitely functional. It’s a happy place for all of us. Janella sleeps like a… well, a baby in there.

But I do have some things I want to finish up in there after we complete our laundry room and office to-do lists. For one, we bought three large canvases for that wall behind the crib and Nick is planning to paint a world map on them. I can’t wait for that!

See you Thursday for the laundry cabinets reveal, right? It’s a date, right?

The Case for Baskets

When I was preparing for the baby’s arrival, I knew that we would need baskets and boxes and all that stuff to corral ALL THE BABY STUFF but I didn’t exactly understand just what the STUFF would be, so I couldn’t just go out and start buying random baskets.

Instead, I waited and gave it a few months. It was worth it, because it helped us figure out exactly what to buy and what to skip. I’m not done yet and I know the STUFF will increase as Janella gets older, but this is a good start for us.

Come and visit, why don’t you. Check out the nursery closet…

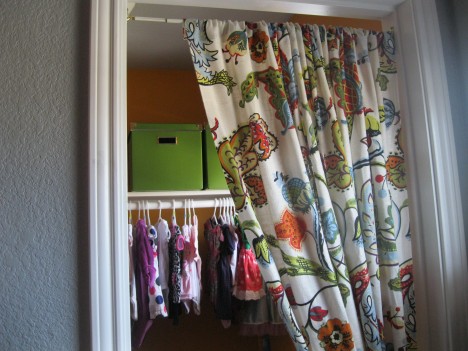
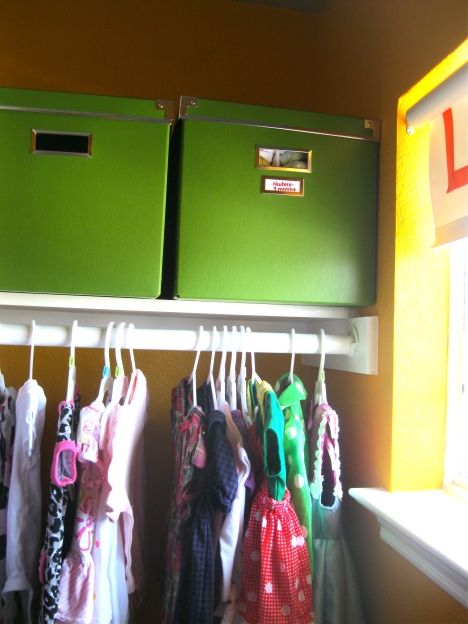
orange closet green boxes organization

First – the clothes! Janella is six months old and obviously doesn’t fit in her newborn or 0-3 months clothes, but still fits in her 3-6 months clothes. Yes, she’s a thin one. 50% in height, 10% in weight.

The green box (from IKEA) on the right is filled with newborn and 0-3 months clothes. The one on the left is pretty much empty and waiting for the next batch of t00-small clothes. These little cute boxes do the job! No need for huge plastic bins. For now.

green boxes closet

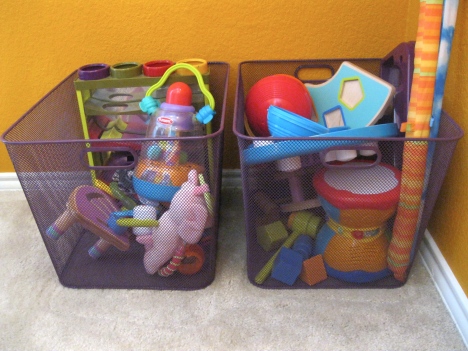
Janella’s stash of toys were getting out of control, so we found a couple of spots around the house to keep them contained. These two cute purple mesh baskets were found at Home Goods and they store toys that Janella isn’t currently playing with (we rotate out toys).

purple wire baskets closet nursery

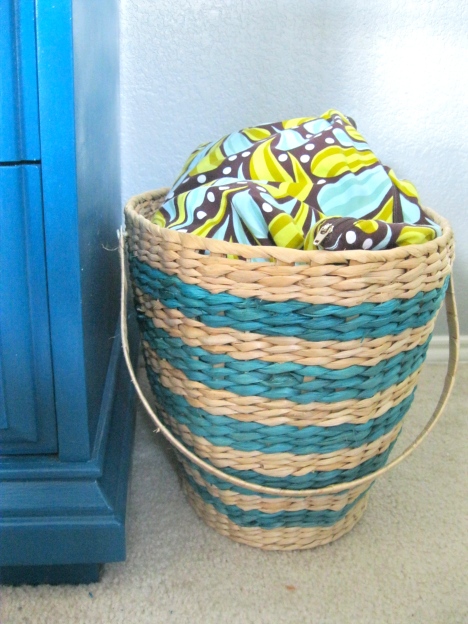
Okay, back up a little to re-enter the nursery. This little picnic basket with teal stripes were picked up at Target and holds all of Janella’s cloth diapers.

diaper basket nursery

I know what you’re thinking. A picnic basket?! But it is the perfect solution because I wash these diapers almost everyday and it’s hard to empty out the dryer with a squirming baby in one arm. With the picnic basket, it’s easy to just pick it up by the handles, dump the diapers in it, and transfer it back into the nursery. Plus, it’s cute and it will still be useful when I’m done with diapers. When will that be, by the way? I wonder…

I can’t move on without telling you about the colorful bag you see in the basket. It’s called a wet bag and it is an ESSENTIAL item to have if you use cloth diapers. It’s waterproof and seals in all odors. I can’t imagine using cloth diapers without these bags. You can find them at Amazon – we have three of this.

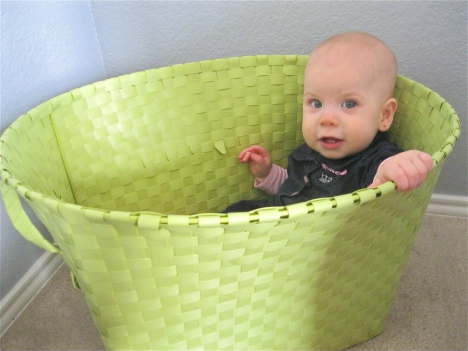
Okay, now turn your head a little to the right and you’ll find a cute green laundry basket with a cute baby in it.

green laundry basket janella

I have a confession to make: Janella’s not always in it. So, the basket isn’t always this cute.

Nick found the basket at Target and brought it home without consulting me. I was two weeks postpartum… It was a risky endeavor but he did a good job. It’s the perfect size for all of Janella’s tiny clothes and when it’s full, it makes a full load.

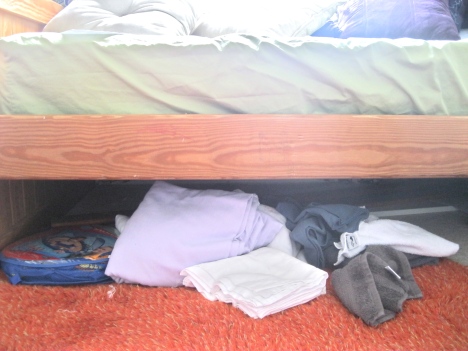
Lest you think that I’m some kind of organized guru with 1,000 baskets that hold all kinds of categories of stuff, let me show you what it looks like under the daybed in the nursery. (I haven’t told you about the daybed, have I?)

sad area under daybed nursery

Yep. Time to get some more baskets. I’ll measure the space and put the measurements in our iPhone to help us find the perfect baskets that’ll fit in there perfectly. For now, just don’t look under there. Thanks.

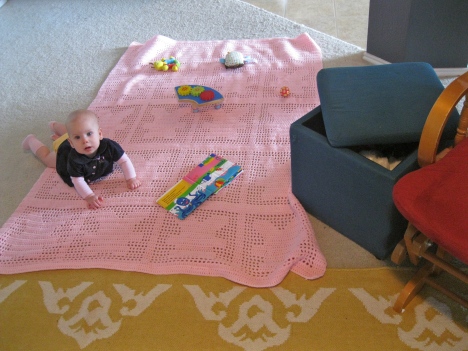
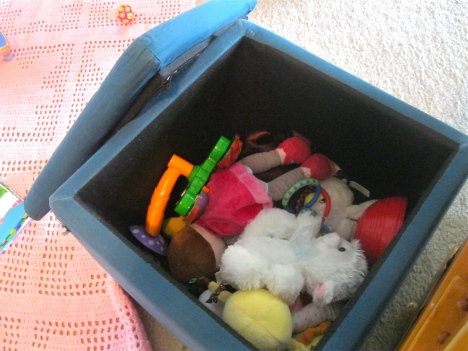
Since we spend a lot of our time in the living room, it’s where we store the majority of Janella’s toys that she plays with these days. For a while, we just dumped them in a corner or in a baby swing, but that got annoying fast. We realized that we had two old teal ottomans that were holding random things like old letters and blankets, so we emptied out one and chucked in all the toys in there. (I want to reupholster them, but you know, later.)

ottoman in living room baby toys

It’s perfect.

toy storage ottoman living room

At least, for now. The time will come when this little ottoman won’t be able to contain all of her toys. It will be a sad day…

The other ottoman is residing in the weird space between the TV set and our side table.

sad area in living room

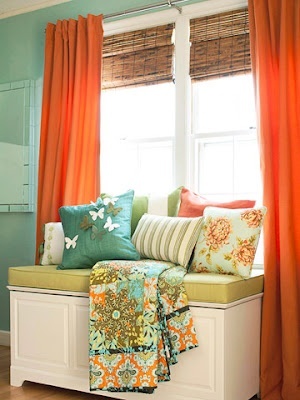
It feels like wasted space. The space is actually bigger than what it seems like in the photo above. It would be great if we could fit in a chest under the window that holds blankets, toys, etc with a soft cushion to sit on. Something like this:

chest under window

via

If you’re looking for baskets, boxes, and that kind of stuff, some great sources include IKEA, World Market, Home Goods, and sometimes Target.

There’s a couple of green baskets at Target that I’m itching to get my hands on but I’m waiting for them to go on sale. Will I win? Or will I lose when they go out of stock without going on sale? I don’t like this game.

So. That’s the story of how I got my act together and organized everything. And by everything, I mean only a few things. I guess I need to buy more baskets and boxes.

Before I leave, I want to say a heartfelt THANK YOU to all of our family and friends for the gifts and hand-me-downs that you’ve given to us. You’ve been amazing and we’re so grateful. XOXO

Before and After: Janella’s First Dresser

This is definitely my favorite part of Janella’s nursery.

Why do cameras hate the color teal? The color never shows up right in photos. Our teal office looks blue in pictures, and the same goes for this dresser. I don’t know what the color of the dresser looks like on your monitor, but I’m looking at the above photo and it screams BLUE to me.

I heavily edited a photo to show you what the color really looks like in real life…

nursery teal dresser after 1

The teal color is very close to this:

teal bluevia

So – for the following pictures, just tell your eyes to stop lying to you and look at the dresser as if it’s teal, not blue. Got it? Good.

This project was all Nick’s doing… I was pregnant at the time, so he did all the work. I’m so happy I’m not pregnant anymore, I’m telling you. Not because I can paint now, but just because. Pregnancy = blah. But I will gladly do it again because… well, just look at her.

silly janella

Anyway.

It took several coats to get it to its final teal-ness. We tried out flat paint this time – all of our previous furniture painting was with satin paint. I’m not too sure I would recommend flat paint due to the amount of coats Nick had to do. But was that because of the flat paint or because the color is so saturated? Not sure.

The color is Behr’s Peacock Tail. After two coats of primer (which was white, not tinted, which might have also contributed to the need of several coats of teal paint?) and two coats of the teal paint, the dresser looked like this:

You could easily see all the brush marks and the color was uneven. But after two (or three?) more coats, the color finally looked right. Whew.

Nick, hard at work. Note the toilet paper on the sofa behind him. I had a cold at the time, OK? Also note how we taped off the edges with green tape. An important step – if we didn’t do that, the paint job would have looked sloppy on the drawers.

The painting wasn’t so bad, but the poly was a beast. Nick tried everything and we still could see streaks at the top from the poly. It’s not so noticeable anymore, but you can see the streaks in the next photo.

So annoying. I think we’ll go with wipe-on poly next time, or spray-on poly. But spray-on poly is sorta expensive and we’re sorta cheapstakes thrifty.

Then I couldn’t decide whether to keep the hardware brass or paint it silver, but after a vote on this and all of your helpful comments, we decided to keep it brass. But I’ll do some cleaning up to make them shine sometime later. Later. I love that word: LATER. I wanna try this nontoxic, homemade brass polish – it looks very nifty! Nifty, that’s another favorite word.

nursery teal dresser after

nursery teal dresser after

The dresser is the perfect size to hold all the STUFF that a baby requires. I’m really glad we didn’t go with a smaller dresser! Our changing pad also fits on the top of it perfectly, with space left over for other STUFF. What, I don’t know. I don’t have any experience with babies older than 3 months. I’m learning as I go here, people.

nursery teal dresser after

The nursery is nearing completion. What’s left:

– Finishing up the bird mobile that my mom made
– Creating a map canvas thingy to put on the wall behind the crib
– Washing our old orange shaggy rug
– Painting the daybed a glossy white
– Painting the mirror to be put up next to the bookshelves
– Painting the side table some color, to be decided later

Not too bad… I knew we wouldn’t finish the nursery in time for Janella’s arrival, but we made it functional before that big date and I’m glad we did! At least, hopefully we’ll finish it completely before Janella moves in there. When will that be, Janella? When? WHEN?

Check Out My Crib (Skirt)

Our crib skirt is really cute. I finished it over a month ago, I don’t know why I’m just sharing it with you now…

Oh yeah, because there’s a newborn around here. But I’m getting a handle on this new life and I think I’ll get back to posting at least three times per week. Let’s hope for the best!!

Okay, so, our crib skirt! I mean, Janella’s crib skirt. I guess everything in the nursery is now officially hers. Even though she hasn’t slept in that room yet.

I really liked this sweet polka dot fabric, Dumb Dot in charcoal by Michael Miller. I found it at Tonic Living.

The price was right – under $10 a yard. And the dots on the fabric were so helpful – they helped me cut in a straight line. This was so much easier than cutting the fabric for the curtains.

And it looks sweet with our white crib

Please ignore the green sheet. I couldn’t find cute and reasonably priced crib sheets, so we just went with what we found at Walmart. But after thinking about it, I’ll buy white crib sheets and keep the crib bright and simple.

There’s no tutorial here on how to make a crib sheet, because it’s a really straightforward process and I pretty much followed this tutorial, except I didn’t hem together the three pieces (the front piece and the side pieces).

Naturally, I hemmed the fabric with hemming tape. My sewing machine is STILL inside its box. Soon, it will see daylight. Soon. Soon. I’m hoping if I say it enough, it’ll happen.


But there was a problem. You see, I attached the crib skirt to the crib with Velcro…


…but the metal thing you see in the above photo was just in the way. It made the fabric stick up at the ends, like so:

Yes, I know. It’s a white people problem (even though I’m half Mexican), but it bothered me. So I found a ghetto solution… I taped it down.

Whatever works, right? You can’t even see it unless you look at it up close, and I don’t think anybody will. Except on this blog. But whatever! If it continues to bother me, I’ll add some kind of mesh backing to join the three pieces together and hopefully make everything nice and flat. For now, it works.

Why did I add a crib skirt when the Gulliver crib already looks good without it? I wanted to add some more pretty fabric to the nursery and also give us some extra storage space. If we ever need to, we could fit some boxes and things under the crib.

For now, it holds cats.


Vaquero loves to sleep under there. Sometimes he attacks my feet when I’m picking up or putting down Janella. Makes my life a little more exciting.

The crib’s in our bedroom right now, though. Good thing the crib skirt matches our bedroom!

Yep, white crib sheets will be better. (This is the waterproof cover… Am I a bad parent for letting Janella sleep on that instead of a sheet? In my defense, the sheet was being washed.)

On Cloud Nine With Our Closet

Another piece of the nursery puzzle is done!

While I’m sad that Baby doesn’t want to come out yet, I’m happy to have the extra time to finish off the closet.

Later on, when Baby is up and about, we’ll know more about what we need in terms of storage solutions (maybe a tiny Expedit for toy storage, for example, or shelves for shoes), but for now it is cute and happy and done!

Here’s what the closet looked like before – a blank slate.

Since the closet is between the crib and the upholstered chair/pouf that we have in the nursery, the door was kind of annoying to open and close. Plus, our AC/heating system is kind of wonky and it would get really, really hot in there if the door was closed. So, the first thing we did was to remove the door.

And you remember my caulking and painting job. We also didn’t like how the brown rods looked, so we primed and painted them white.

Our dresser, originally intended for the guest room, fit in the closet better and provided us a way to organize extra stuff.

Look up and see our boring closet light. How exciting.

We discussed a couple of different color possibilities for the closet, but the only one that made sense was ORANGE, BABY. We tested out a couple of orange colors and settled on Amber Glow – it’s a soft orange and went well with the curtains. The other colors reminded us too much of the Longhorns and if you’ve ever been in Austin on a Saturday, you know we have too much of that rust-orange color prancing around.

After painting the ceiling gray, the walls orange, caulking and painting the shelves, and hanging up the leftover fabric from our curtains, we were done!

I’ve always loved the closet in Sherry and John of Young House Love’s sweet nursery and how they used the curtain as the door, so that was what we did here.

Unfortunately, the fabric that we had left over from the curtain project did not quite reach the floor. Instead of leaving it as is and thinking of flood pants every time I look at it, we simply gathered it to the side with a ribbon (from our ribbon shades) and hung it on a tiny hook. So cute!

The ribbon was easy to make – all I did was to iron-hem the ends and add velcro. Ta-da!

We also tried to reduce the “flood pants” look by lowering the curtain rod as much as we could without it looking funny.

We really struggled with how to hang the closet curtain. YHL hung theirs on a tension rod, but we weren’t sure we wanted to go that route because we didn’t feel that it would be very secure. We thought of many different possible solutions that were all mostly stupid, but we finally found this thin window rod at Wal-Mart that worked perfectly! I don’t know what it’s called (bad blogger), but you can find it at Wal-Mart for around $3.

Come in and peek inside. You’ll see another tiny roller with the royal ribbon treatment. I also think this photo represents the orange in the closet the best.

What’s inside the closet? Not much right now, but I’m sure it’ll fill up quickly. Diapers, tiny clothes, a breastfeeding cover, and a couple of other essentials.

I know, we don’t have much baby clothes. We actually do have more plain white onesies tucked away in the drawers – and a few very cute gender-specific outfits that I don’t want to show you yet. The gender is a secret!

I don’t want to buy too many clothes before I know what size Baby is. I hate wasting money.

I had a lot of fun personalizing some white onesies with paint, though! I’ll talk more about that in another post, but you can see a few of them here – the KISS and the Phillies onesies.

And yum, could you just eat up that white white whiteeee shelf and rod? And the caulking is perfect. Yes, I’m proud of myself. That was an extra step worth taking.

Okay, on the other side – the dresser and the world’s cutest humidifier in the shape of an excited baby elephant. That’s pretty much it – for now. The dresser is stocked with blankets, towels, PJs, socks, hats, and cloth diapers.

But my favorite part is when you look up!

Isn’t that just adorable? That’s the cloud light, as I call it. Actually, it’s the SKOJIG light from IKEA. It’s the perfect light for the closet – it’s almost flush to the ceiling, so it doesn’t interfere with the shelves, but it makes the closet a more special place.

A word of caution if you’re considering the SKOJIG light – it didn’t really fit our… ah, I need to develop my electricity/lighting vocabulary. I don’t know what any of these things are called. I hope the photo below is clear enough for what I’m trying to tell you about…

Basically, it didn’t fit, so we had to drill new holes to get it to fit. We’ve had problems with the other IKEA light we have (in our office), so this might be an IKEA thing (European measurements?) or just something weird about our home? We don’t have any problems with other ceiling lights. Do you have any problems installing IKEA ceiling lights?

Anyway, despite a few tantrums from an unnamed person (not me), we got it to fit. And we love it. Especially when the light is on and the clouds smile upon us…

So that’s our little orange closet for our little colorful nursery for our little baby.

Officially one week late today. Nick and I are always late to everything, so I guess this is just a taste of our own medicine. It doesn’t taste too good.

Finding a Place for Mother Goose, Dr. Seuss, and Their Friends

We love books and we know our baby will love to read as much as we do. That’s why we asked our guests at our baby showers to bring a book along with a gift, so we’re off to a great start with piles and piles of books!

I cannnnnot wait to watch Nick read to our baby. (heart melts)

But how to store these books?

After searching Pinterest and blogs for ideas, I had several options:

Option #1: Use rain gutters as bookshelves.

pinterest (original source seems to be lost)

This would be a very economical route and it looks cute to boot! It doesn’t even look like rain gutters. But we would have to cut the shelves and do a lot of DIYing to put them up on the wall, along with spray painting them a nice white.

Option #2: Buy white RIBBA picture ledges from IKEA.

Sarah Jane Studios Blog

I loved this photo (above). The shelves look so clean and pretty. But we would have to shell out $15 per shelf… which isn’t really bad, considering that we wouldn’t need to do any painting or cutting whatsoever.

Option #3: Sew cute fabric into hanging book displays.

penny carnival

I really loved this idea – with a great fabric, this would be a really cute addition to any nursery. But all the supplies and work needed to make these things would add up and I wasn’t sure this would cost any less than the easy RIBBA picture ledge solution.

Option #4: Turn BEKVAM spice racks from IKEA into tiny bookshelves.

BLAH BLAH BLOG

Very, very cute! And cheap, too, at only $3.99 each. However, we would have to buy several of them, since they’re so tiny and we have loads of books. And we would also want to paint them white, so that would require us to purchase several cans of white spray paint. And primer…. and the time required to paint them all.

Can you guess what we went with?

Yep – we went the easy route with the RIBBA picture ledges! I’m hugely pregnant and he’s hugely tired of all the DIY projects we’ve been tackling, so it felt good to do something easy for once. Plus, we liked the modern look of the ledges AND they were reasonably priced since we wouldn’t have to buy paint or any other extras.

We taped everything off to determine whether we needed three or four shelves. We thought we could put up four shelves… see all the space available above the tapes:

Never mind the mess, please. I promise it’s clean now.

But when Nick put the shelves up, he didn’t measure too carefully (that’s okay, babe), so there wasn’t enough space at the top for a 4th shelf. We thought maybe we could put one near the floor, like so…

Not too bad… but we can just see the little kid attempting to climb the shelves. So it was a no go. I’m not sure what we’ll do with the fourth shelf. It’s currently hanging out in our game room, waiting for its fate.

Nick did a great job styling the bookshelves. No, I’m not sure what’s exactly in his mouth.

I love how it looks right now! I think it would be really great with four shelves (we still have a couple of books that need to find a place), but this will do for now. We might decide to move everything around later on and add that fourth shelf, but right now we’re calling it done.

However, that empty space to the left of the books isn’t done. We talked about putting up art or something, but we remembered that huge mirror that came with our dresser.

I think I like it!!

Then I saw Julie Bowen (of Modern Family)’s beautiful dining room at Honey & Fitz:

Honey & Fitz

Look at them mirrors – so beautiful, so unique! We already have some yellow paint from our dining room and lots of gray paint in our little paint collection, so I think this will be a great color combination for our huge mirror!

The only problem is figuring out how to hang it securely, since it’ll be right next to our daybed. I don’t think I will tackle this project until after Baby comes (40 weeks + 3 days now), so hopefully Nick’s dad, who is very handy and will be staying with us for three weeks with Baby Vita, can help us out in this area.

Is that cool with you, Dad Vita?

What about you, Baby Vita? If you’re even in there, that is. I’m beginning to think this is just a phantom pregnancy

P.S. Thank you all so, so much for your opinions and votes on the dresser handles! We agree with you all and we’ll stick with brass… and we’ll clean them up a little bit. Later.

Silver or Brass? Opinions Needed!

A quick post – I need your opinion! Here’s a small peek of our painted dresser for the nursery, but I can’t decide…

Should we leave the hardware brass or turn them into silver?? I have Rub ‘n’ Buff in silver all ready to go, patiently waiting for me to make up my mind. Nick has no opinion. What’s yours?

(The color is more teal-ish than what is shown here. Silly camera!)

Weird Animals: Some Easy DIY Art for the Nursery

I was so excited to have the six Ribba frames gifted to me for my birthday last May (Nick promised me 9, but we realized that nine Ribbas wouldn’t have fit our wall. Our walls are only 8 feet tall).

But then I had to decide what to put in them. And I wasn’t sure what to do…

Art is expensive, in case you didn’t know. I thought I would go with art from 20×200, but I quickly realized that $20 x 6 = $120. Since we already paid that much for the frames themselves, we needed a cheaper solution.

Besides, the baby won’t notice them until much later. We can always switch up the art later on when Baby finds what he/she loves. I can’t wait to find what the little baby inside my belly ends up liking! Dinosaurs? Flowers? Planes? My Little Pony? Wait, it’s not the ’80s anymore.

I decided to look through Vintage Printable to see if there were any art on there that could work. I found some animal drawings that I really liked, because they weren’t your usual baby animal photos. They were a little odd and a little freaky (in a good way).

I fell in love with this rhino right off the bat:

Isn’t he the coolest?

We did a test run with him – printed him out, cut him out, stuck him on a colored scrapbook paper, and put it all in one of the frames.

We loved it – simple but colorful, perfect for a little person but not too babyish.

We grabbed a swatch of our curtain fabric and went to Hobby Lobby. We looked for six different scrapbook paper to act as backgrounds for the animals and used the swatch to help us find the perfect six colors.

This cost us pennies, since we grabbed them when they were 50% off! That Hobby Lobby, always having 50% off sales!

The next step was to find more animal photos and print them out. We chose a spotted lynx, squirrel, reindeer, whale, octopus, and, of course, the rhino. But some of them were in color and we wanted everything to be in black and white to go better with the colored backgrounds. So I edited them with Picnik, easy peasy.

I carefully cut them out.

(Never mind the lobster – we decided to not use it, since we already had two water animals – the whale and the octopus.)

And that was the hardest part. For me, anyway. The next step was to carefully center each animal on the colored papers, glue them on, and pop them in the frames. Again, easy peasy.

Nick had to do the hard work of measuring, hammering in the anchors, and working on the annoying Ribba wires on the back of the frames. They’re still not lined up perfectly, but with a few more adjustments we should have everything perfect and pretty! (Another idea is to attach the frames together, like Bromeliad did)

I love it. Aside from the frames, this cost us literally pennies. Maybe a few bucks, if you count the ink and the paper used in the printing of the animals. Oh, and glue if you want to be a stickler. For sure, all this cost us less than $5.

The frames are above our newly painted dresser which acts as our changing table. (I can’t wait to show you the dresser!)

The art is right across our curtains, so it picks up all the colors. The frames also makes our walls look taller!

There are loads of more animal photos available on Vintage Printable – here’s some more animals that I liked and would have used if we had 9 frames instead of six:

Unfortunately, the website is NOT easy to use. It’s a pain to navigate through and search for photos. But it’s so jam-packed with great (and FREE) art that you can print out or send to Kinkos to print in larger sizes. It’s worth it the hours that you’ll have to spend to find the art you want. Just be prepared to devote a chunk of your time clicking through all the photos. Maybe you’ll have an easier time depending on your browser, though – I’m using Firefox and ugh.

But…! It’s done and I love it. The nursery is coming along nicely!

My due date is this friday – October 7. It’s crunch time… unless Baby comes out late. Which I think will happen. Maybe?

How to Caulk Without a Caulking Gun

Just call me MacGyver… or a cake decorator.

This post might be a little boring to you, but I’m so proud of my hard work that I just had to show you what I did. Plus, my little adventure here is a testament to how the little things that you do around the house can make you so happy, even though nobody else will notice what you did.

Let me introduce you to the closet of the nursery:

It’s a pretty roomy closet, so we’re fixing it up in order to maximize its space and… to make it pretty, of course. I’ll show you more of this closet later on when we make some more progress, but today I want to talk about caulk.

This house was brand-new when we bought it, but the builders did a BAD job with the caulking. I can’t believe how many cracks we can see in the caulk all over this house.

It’s ridiculous. Caulking isn’t rocket science. It’s not even freshman biology.

The nursery closet was full of gaps and ugly cracks due to a bad caulking job.

Ugly.

Unfinished.

Since this closet will be dedicated to our special baby, I wanted it to be perfect. I also didn’t want to fix the caulk later on after the painting and the decorating. So I decided to grin and bear it and caulk everything NOW.

Out came the caulking gun and the caulk tube that came with the house.

I put the caulk tube in the gun and squeezed. Squeezed. Squeezed some more. No caulk was coming out. I kept on squeezing and squeezing. There was a small pop… Weird.

Squeeze. Squeeze. Squeeze.

Until I came to the end of the caulking gun’s squeezing range. Did that make sense? I mean, I couldn’t squeeze any more. The caulking gun was all squeezed out. And there was no caulk coming out. Huh?

I pulled out the caulk tube and found this…

Oops. I broke it.

I think the caulk dried up at the top so all my squeezing was for naught and it just pushed through the bottom of the caulk tube. Good times.

I sighed and contemplated asking Nick to buy some more caulk on the way home from work.

I stared at the caulk tube.

The caulk was soft and plentiful. Wasted caulk, wasted money, wasted time.

I squinted my eyes… wait a minute. The caulk itself was still in good condition.

Now this is where the MacGyver (or cake decorator) part comes in. I grabbed a ziplock bag and put a few spoonfuls of caulk in it.

I cut off just a little bit at the tip and tested it out.

It was beautiful.

I hate hate hate hate using the caulking gun. It’s messy and it makes me all paranoid because the caulk won’t stop flowing, so I have to caulk with my heart beating fast and then quickly pull the handle on the gun to STOP THE MADNESS.

With this ziplock bag method, I could just caulk at my own pace. The bead of caulk was also tiny, so it was really easy to just wipe it down with my little finger. It felt nice. Relaxing, even.

I think I won’t ever use a caulk gun again.

Much better, right?

I caulked everything and gave the shelf and supports two coats of white paint to cover up the dingy white that was there before. Do apartments and buildings shop at the same paint store? Is the store called Dingy White Paint? Why can’t they use Ultra White? I will never understand their obsession with dingy white.

Better. Ahh. Never mind the white paint on the walls, we’ll paint over that.

Yes, much nicer.

The whole time I was doing this, I felt like I was channeling Benita from Chez Larsson – she does things like this all the time, doing the “little things” and making them all pretty and white.

So that was my caulking adventure!

I’ll tell you more about the closet very soon. I have to go and work on it right now, actually. I’m 38 weeks now and my hands are kind of swollen, so I’m thinking that maybe, just maybe, Baby will come soon. I gotta hustle, people!

A little glimpse at our progress:

Tutorial: How To Add Ribbon to Roller Shades

Okay, so let’s talk about how I put the orange ribbon on our cheap blackout vinyl shades.
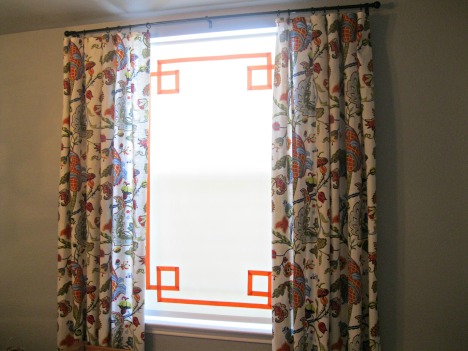
Yes, I promise these are room darkening shades. It might not look like it in the pictures, but they do help darken the room significantly (not completely, though) even when the Texas sun is shining at its brightest.

When left plain, the roller shades were boring and kind of yucky. The orange ribbon does wonders in brightening them up and giving them a purpose for life other than keeping a baby asleep.
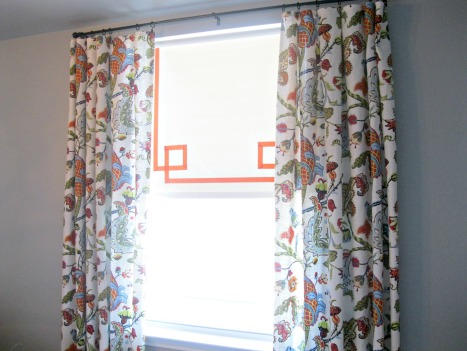
It all started when I searched through Pinterest for inspiration for adding ribbons to roller shades. I knew I wanted to go that direction after I saw what Janell did with the roller shades in her daughter’s room. But I just couldn’t find metal pulls for roller shades ANYWHERE on the internet. The only store I could find was completely sold out in pulls.

That’s why I was thrilled when I saw this photo on Pinterest:

And I became even more excited when I clicked over and found this awesome tutorial. Kathleen shot a video of her working on her roller shades and even included a handy template for the squares at the corners. Let me tell you, that template definitely was needed by someone like me who fudges measurements on a regular basis! I changed some of the measurements, though, because my ribbon was thinner than hers and I wanted smaller squares.

Her video was so helpful in showing me how to fold over the corners just so that they looked great. Even though her video has no captions or a transcript for deafies like me, I was able to follow her process. If you’re looking to make something like this, I highly recommend you to watch her video first!

She used hot glue to attach the ribbon to her shades. I didn’t want to use hot glue because I don’t have hot glue and I have slightly traumatic memories of how messy and hot they are from my high school years (long story, but basically my class sold crafts for our fundraisers).

I thought I would just do exactly what she did, but with fabric glue.

First, I pulled the shade completely down while still on the window and made marks so I knew how much of the shade I had to work on. The full length of the shade is much longer than my window, but that’s fine. (Note: you can get roller shades cut down to fit the length of your window for free at Lowe’s.)

I had to keep my cats out of the room or they would attack the ribbon. Tala, however, did not understand that a closed door meant no playtime.

I started to work on the ribbons, but thought I would first test out using the fabric glue to attach a short length of ribbon on a piece of paper. I wanted to make sure that the glue wouldn’t bleed through the fabric.

I am so happy I did the test, because the glue did indeed show through!
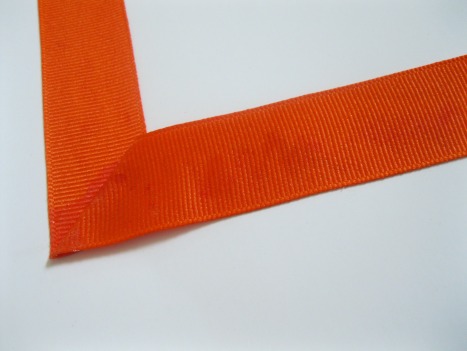
It looked messy and yucky, so I knew that I couldn’t attach the ribbons on the shade the way Kathleen did (if you didn’t watch her video, she measured everything out on the shade and then hot glued the ribbon right on top of the shade, folding and twisting the ribbon as she went).

I stared at the shade and the ribbon for a long while, wondering what to do next. Should I just suck it up and buy a glue gun? But my ribbon is orange and thus lighter than Kathleen’s dark navy blue ribbon. Maybe the hot glue would still bleed through my ribbon?

Hey… what about Heat n Bond?
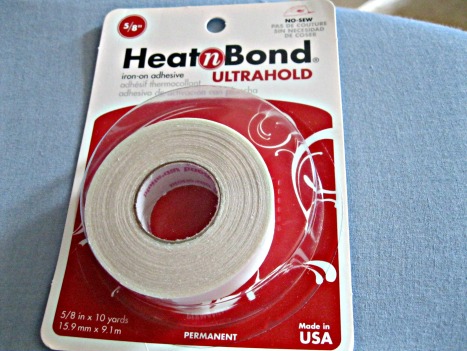
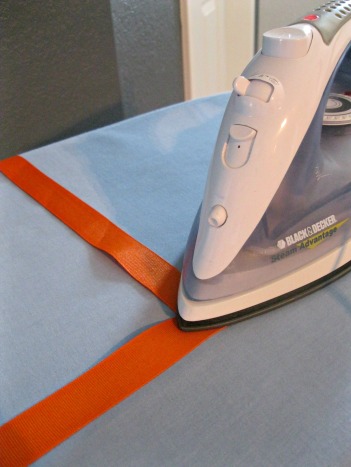
I experimented with folding down the corners using tiny triangular cut-outs of the Heat n Bond.

And what do you know – it worked! It required a bit of ironing and folding and cutting, but it wasn’t too bad. I would recommend that you add the Heat n Bond on both sides of the corners, so there’s no flapping around and it’s all nice and tight.
Another important tool that helped me with handling the ribbon was this magic in a bottle!

The heavy starch really firmed up the ribbon so it was easier to handle. If you’re doing this project, you MUST use heavy starch.

Progress was being made.

I did two corners and then just laid the ribbon out on the shade to make sure everything was looking good. It was.

I then decided to iron some Heat n Bond on the cross-over part on the corners just to make the ribbon a little easier to handle and to make sure everything was nice and straight.

Finally, all four of the corners were done!

Then my next dilemma was… how the heck do I attach the ribbon to the roller shades?!

I had some cut up roller shade vinyl material (from when we got them cut at Lowe’s) so I decided to experiment with it. First, I thought maybe ironing on Heat n Bond would do the trick. But the hot iron just melted the vinyl! I kind of expected that.

Maybe I really needed hot glue… but I was stubborn and besides I didn’t have the car that day (we only have one car and Nick had it for work that day). I decided to squirt out the fabric glue on a plate and use a brush to apply the glue on the fabric.

No bleed-through! Whew.

Gluing the ribbon on the shades was the easiest part. I just had to measure everything out on the shade to make sure that everything was straight and centered. Fabric glue doesn’t dry very fast, so I had plenty of time to brush all the glue on and move it around until it looked just right.

I thought and thought about the tiny window and whether I should do the squares too or just keep it simple…
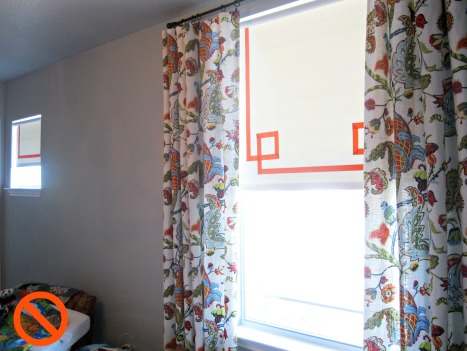
Obviously, I kept it simple. Looking at it now, I kind of wish I did the squares too, but then I might still be working on it right this second… so I’m glad I went the simple route and it’s all finished now!

One final thing – when the sun shines through, you kind of can see the folded corners:

I think it’s because of the light color of the ribbon. If you were to do this project, I would probably recommend a darker color, like black or navy blue or even red. But it doesn’t bother me all that much.

In all, it was a fun project and it was CHEAP! The roller shade was around $10, the ribbon (I had to buy two) cost me around $2.50 each, the glue was, what, a few bucks, the heavy starch… another couple of bucks. I already had the Heat n Bond but that would be just a few dollars, too. After doing some advanced math, I think we spent around $20 on this shade.

I had everything left over as well for the second window.. and the tiny roller shade cost us around $7. So that’s $27 for two roller shades. Not bad at all!

Next project for the nursery… the dresser! We’re Nick’s almost done working on it! I can’t wait to show it to you.

Linking up for the Window Treatment Challenge at the CSI Project…