How Electricity Ruins Everything

Well, I promised you that I would be back today with an awesome addition to our laundry room. Unfortunately, my plans have been thwarted by dumb electricity. I mean, who needs electricity in the laundry room? Don’t we all wash our clothes on a washboard?

Basically, the area where I planned to drill in some screws is apparently filled with electrical lines. Or so says my stud finder. I’m still hoping that it changes its mind, but no luck so far.

Let me just tell you about my plans because I still think it’s a cool idea and maybe someday America will lose all power and I will finally get my chance to achieve my dream. One can only hope…

A few months ago, I saw this very cool home at Brick House that had this clever solution for hanging up clothes sans closet.

Pipes! I loved how industrial this looked and I knew it would be a great solution for our laundry room (not).

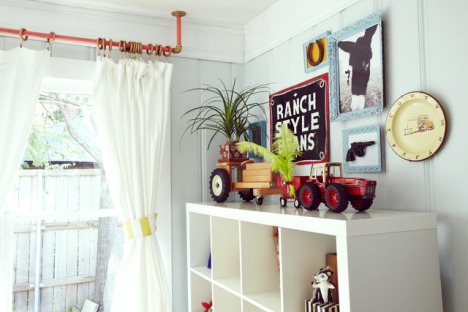
Later, I stumbled into this adorable nursery at Apartment Therapy and gasped (in my mind only) when I saw this photo:

Pipes, painted coral and gold, holding up curtains? SO COOL.

I’m sad just thinking about it. I tried moving it in different configurations and using two different pipe sizes, but I just couldn’t find a way to make it work and have it look good. I’ll find another way to hang up wet clothes, but I’ll also have to find another use for my pipes and floor flanges.

IMG_3100

(I also have a third pipe. Bigger than these two and just as useless.)

My cool clothes hanger was supposed to be installed below the small cabinet on the left:

IMG_3194

Oh well.

I’ll need to find another use for my pipes. Perhaps they can become legs for my jewelry cabinet, a la Brick House’s dipped legs.

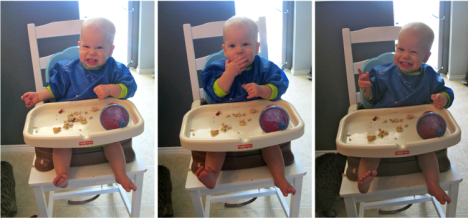
Fortunately, a little elfin worked very hard to cheer me up today.

silly baby

New Rug Leads To Some More Hard Decisions

My life is so hard.

We just found the perfect rug for the laundry room… and that forced me to make some hard, life-altering decisions. But now I look back on it and realize that it was the best thing to ever happen to me.

Okay, enough with the silliness. LOOK AT MY NEW RUG! YAYYY

IMG_3999

The rug is from Urban Outfitters. I really enjoy their rug selection – the rugs are always well-designed and reasonably priced. I’ve been checking their website constantly, hoping for a suitable rug for either the laundry room or the green bathroom.

I was really thrilled to find this rug – the colors are PERFECT for the laundry room.

IMG_4000

The blue on the rug is a CLOSE match to our walls… it’s basically a shade darker of the same color. It’s serendipity, I tell you.

And the dark gray… you know it. Goes perfectly with our dark gray cabinets.

IMG_3184

I’m frustrated that I can’t get a photo showing both the rug and the cabinets. Close your eyes and visualize the previous two photos on top of each other. That’s what my laundry room looks like! YAYYY

Of course, a new purchase for the house ALWAYS leads to more decisions that we need to make. I’ve been thinking about choosing fabrics for the laundry room for a while, but wanted to wait until we got a rug because it’s easier to find fabrics to go with a rug than to find a rug to go with fabric choices.

For now, I needed to find two fabrics for these two purposes:

fabric locations laundry room

I just went straight to Tonic Living, because I really like their fabric selection. There are many other online fabric shops, but they have SO MANY FABRIC CHOICES that it’s easy to get overwhelmed at these sites.

I still got overwhelmed at Tonic Living with all the great fabrics, so I just narrowed it down and down until I had several choices. Then I put them all around a photo of my rug. I used the Pages application for this step.

fabric dump

clockwise from bottom left: 1, 2, 3, 4, 5, 6, 7, 8, 9

As you can see, I also put a dark gray background at the top and a light blue background at the bottom to see how the fabrics would look with our two main colors in the room.

Then I chose my four favorite fabrics and played with them:

fabric choices 1

fabric choices 2

I really like both choices, but I liked the second one slightly better. I did a mock-up of the whole room in Pages just to see how everything would look together, along with some more additions to the room that we’ll make in the coming weeks.

laundry room design 1

This really helped me visualize the room. I played around with all kinds of fabrics, colors on the shelf, the colors for the shelf itself and the folding counter, the hanging bar, etc etc. I finally landed on this design and it has been NICK APPROVED. YAYYY

I just had to torture myself some more and do the other side, too:

laundry room design 2

That little door with the hole in it will house our cats’ fancy litter box. The design isn’t final yet – it all depends on Nick’s progress there and what he figures out as he goes along. That part will be his project.

After all of this hard work, I feel an odd sense of peace. The path has been set – we just need to walk it. YAYYY

I’ll order the fabric samples just to make sure they look good in person ($1 each at Tonic Living) and continue trying to figure out a lighting solution for the room. I’m leaning towards buying a metal pendant from a big box store and spray painting it yellow.

I’ll be back on Thursday to show you another little addition to the laundry room! We gotta hang it up first (that’s a hint). YAYYY

Laundry Cabinets: Covering Up Gaps and Installing Molding

After we installed our laundry cabinets, we were left with two gaps – a huge one on the left and a sloped small gap on the top.
IMG_2689

Here’s how we covered up these gaps.

We cut a piece of wood to fit in the gap between the wall and the cabinet and painted it gray. So much painting. My painting clothes are covered with Web Gray. I’m so sick of Web Gray at this point.

Nick’s parents flew back to Pennsylvania and we were left behind to finish up the project on our own.

Nick pushed up the wood piece into the gap. We originally thought we would glue the wood piece to the cabinet, but the fit was so tight that we figured glue wasn’t necessary.

IMG_2691

Nick used a piece of wood to hammer on to make the wood piece flush with the cabinets. If he had hammered straight on the cabinets, we would be left with unsightly marks.

IMG_2692

All flush and ready to be screwed in!

IMG_2695

Yes, there’s still a gap at the top, but we’ll get to that later.

A note – our cabinets are solid, solid wood… VERY solid. Thus, we had to pre-drill all new holes. Here, Nick’s pre-drilling the hole where the screw will go in.

IMG_2710

Janella woke up from her nap so she joined into the action. But she apparently was still tired… She was reaching for the drill bits and yawned just as I took this photo!

IMG_2712

So cute. I look forward to having her hang out with us with her toy tools when we’re working on DIY projects in the future. So fun!

The last step was to put in molding (or moulding, which is the UK spelling that’s used in Northern U.S. Since we’re in Texas, I’ll spell it molding. Yes, I googled it).

Here’s a dumb and low-quality photo (thanks, Photobooth) of me holding up a primed but not yet painted piece of molding to show you its shape.

Photo on 2012-06-26 at 22.44 #2

We cut the corner edges using a saw and a plastic miter box. You don’t need a huge miter saw for this simple project. But that doesn’t mean I want one as a gift in the future (hint, hint).

IMG_2723

See how the molding covers up the gap perfectly?

IMG_2724

Next up was putting in the finishing nails. We were scared to do this part… and I really wished that we had a nail gun. In the end, I do think a nail gun would have been MUCH EASIER and efficient and would have given us a prettier result.

Nail gun, another possible gift in the future, cool? We could have rented a nail gun but this was such a small job that it wasn’t worth the price of rental.

We got this small hammer and a box of 1-1/2″ finishing nails. Some tutorials out there say to get 2-inch nails, but this worked just fine for us.

IMG_2725

The hammer, however, didn’t work so well. We quickly abandoned it in favor of a regular ol’ hammer. The process DID put some dings in our ceiling, but that was easily covered up with minimal drywall putty and touch-up paint.

We used this thing.. a nail set, I think it’s called… to drive in the nails some more to sink it lower than the molding.

IMG_3093

It worked okay. The thing is, our cabinets are SOOO solid that we actually had to pre-drill the holes before hammering in the finishing nails. Ugh. Another reason I really wish we had a nail gun. Newer cabinets might be easier to hammer in than the ones we have.

Then we filled in the holes with wall putty… because I just DIDN’T FEEL LIKE priming the holes, which I would have to do if I used wood putty. But it doesn’t look perfect. So… I will go back and cover them up again with wood putty, prime, and paint sometime later in the future. When I detox from all the painting I did. But this is a BIG IF because you really can’t see anything unless you look at the nail holes closely.

After lots of touching up on the ceiling, the walls, and the cabinets with lots of weird body bendings on my part…

IMG_3182

WE ARE DONE!

IMG_3184

The only thing I’m not sure about is the piece of wood that we added on the left. Should I caulk the space between the wood and the cabinet to make it look like one piece? Or would it look funny in the end?

Nick says we should just leave it, but I’m not so sure. I’ll decide later.

So happy that part’s done. We tossed our towels and stuff in these cabinets and it’s amazing how much these cabinets can hold!

There are even plenty of space left and we’re still planning on adding more storage solutions to the room. We do have lots of things, such as toilet paper and paint buckets, hanging out in random places around the house that I would love to transfer to the laundry room.

The laundry room is far from done, but the cabinets were a HUGE piece of puzzle and the room is now FUNCTIONAL. So happy.

What about you? Would you have done some things differently? We’re still new to all of this, so if you have any tips for molding or covering up gaps or installing cabinets, share them in the comments!

How To Install Cabinets (or at least, how WE did it)

After refinishing the cabinets, it was time to install them.

At first, we weren’t sure how we would do it. I did some research on the internet, but so many “tutorials” were vague and made a lot of assumptions that the reader would know how to do a lot of steps.

We kept on putting it off… until Nick’s parents visited us in June. Nick’s dad, Anthony, is a whiz DIYer. He refinished his whole basement, built a deck and a porch, and did countless projects in his home and everything looks professionally done.

Anthony, move to Austin, pretty please?

IMG_2349

First, he found all the studs and we tried to figure out if we could just use the studs to drill in the cabinets. But since I wanted the cabinets to be arranged in this way:

IMG_2535

The studs just wouldn’t match up. We devised a solution with two long strips of wood. We drilled them into the studs and then drilled the cabinets into them. It worked perfectly!

Here is Nick marking out the stud placements on the strip of wood (I think we used white wood for this).

IMG_2361

Since the bottom strip of wood would be shorter due to the small left-most cabinet, we had to put in a strong anchor to make up for the lack of a stud in that spot.

IMG_2434

Here’s what it looked when the strips were drilled in and ready.

IMG_2444

We left the top strip naked of paint because you wouldn’t be able to see it when the cabinets were installed and I painted the bottom strip because… you would still be able to see it. You’ll see what I mean in later photos.

Nick’s mom, Sandi, jumped in and helped hold the cabinet up while Anthony did the drilling.

IMG_2450

There were already holes in the upper part of the cabinets that Anthony just used again to drill in the screws.

IMG_2453

We did two screws in the top and two screws in the bottom.

IMG_2456

We added the second cabinet and we tried our best to push together the two cabinets. We used a tiny clamp for this, but it worked okay. After we were all done with this project, Nick and I bought a pair of bigger and heavy-duty clamps so we wouldn’t be stuck with these tiny clamps anymore. Oh well!

IMG_2463

Then Anthony screwed together the sides of the cabinets to make sure everything was secure.

IMG_2467

The screw was put between the two little holes you see here – they’re for the cabinet door hinges.

IMG_2468

Then we put up the third strip – the smallest and also painted gray – for the bottom of the small cabinet.

IMG_2472

Some more drilling.

IMG_2476

Finally done with this step! All the cabinets are up and I’m happy.

But…. BUT. Look at the small cabinet…

IMG_2480

Do you see it? Of course you do. There was a huge gap between the side of the cabinet and the wall. AND the ceiling sloped up so there was another gap at the top of the cabinet. How annoying.

Come back on Friday to see how we covered up the gaps. It’ll be the last post on the laundry cabinets for a long while, I promise. I think.

Refinishing Old Cabinets

The saga of the laundry cabinets is so long, I’m dividing it up into three parts.

Today, we’ll talk about how I refinished the cabinets. On Wednesday, we’ll discuss how we installed the cabinets. Finally, on Friday, I’ll show you how we covered up all the gaps and finished it off with molding.

Here we go!

This is what we started with.

IMG_2419

The cabinets had dirty white paint that was sloppily applied.

IMG_2422

Paint spilled over the edges and the brush strokes were obvious.

IMG_2424

I took my detail sander and sanded off the paint drippings on the edges. I wish I had an orbital sander, which would have been a much more efficient tool.

IMG_2427

I thought I would sand off all the paint, but it was too thick and it kept on clumping up the sandpaper. So, I just focused on the edges and smoothing up the brush marks as best as I could.

In the next photo, you can see what the edges looked like before I sanded them on the left side of the sander, and the sanded down edges on the right side.

IMG_2433

After a LOT of sanding and going through several sheets of sandpaper, I was finally done! Well, eh. Done with the first step, at least.

IMG_2436

You can see how all the sand built up in the edges of the cabinets. I vacuumed them out with a vacuum (I need to buy a shopvac soon) and cleaned them up as best as I could.

Unfortunately, the cabinets STILL weren’t ready for paint. There was thousands of holes and dings that I had to fill up with wood filler. This was almost as fun as doing my taxes. No, doing my taxes was SO MUCH MORE fun than filling up all these tiny holes.

The next time I buy used cabinets, I will be sure to check for tiny holes. If there are too many of them, I will pass on them because of how long this step took me in the refinishing process!

But again, all that work and time was worth it because in the end, the cabinets were (mostly) smooth and looked like new.

IMG_0177

To reach that point, I used oil primer (two coats) and two to three coats of Behr paint color-matched to Sherwin Williams Web Gray. I used a foam roller and a high-quality brush.

IMG_3184

Come back on Wednesday to see how we installed the cabinets!

Before and After: Laundry Room Cabinets

The saga of the laundry cabinets is a long one. Luckily for you, I won’t discuss it now. I will go into all the details next week.

For today, I present you some instant gratification! A simple before and after.

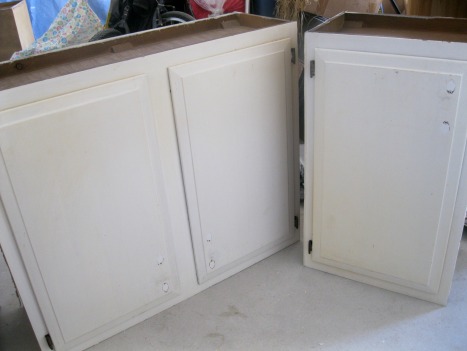
This is what the cabinets looked like when we bought them from a Habitat For Humanity Restore.

Peeling old cream paint, filthy both inside and outside, and many dings and other defects all over that required wood putty. Lots and lots of woody putty.

This is the wall in the laundry room that waited SO long for the cabinets.

IMG_2370

I can’t find a true before photo that shows you the inefficient shelf and clothes hanger rod that were there before, but this is the best I could find. The shelf was too shallow, so towels kept on falling off and a little cat kept on making the situation even worse.

And today, it looks like this!

IMG_3192

Never mind the stuff on the machines. Focus on the cabinets. And the pretty knobs! The knobs are from Hobby Lobby.

IMG_3184

The cabinets make me so happy. It’s been a long time coming, but it’s all worth it.

I’ll discuss later about the other things that we’re working on in that room and what things we want to change (the ceiling light, for one).

But for now… let me bask in the cabinets. You are done, cabinets. D-O-N-E.

9 Things I Learned While Painting the Laundry Cabinets

laundry cabinet before

Before... with a bad paint job and 1,000 weird holes.

all sanded down and ready to go laundry cabinet

All sanded down and ready to go! (and the 1,000 holes have been filled with wood putty)

first laundry cabinet completed

It's a darker gray than what is shown here... but it's done!

Well, I had the whole weekend and what did I complete? One cabinet. Sans door. Out of three cabinets. But to be fair to myself, I did do a whole lotta of sanding, wood filling, re-sanding, more wood filling, san.. you get the idea.. on all three cabinets and four doors.

I also wanted to complete one cabinet first to see if the primer and paint could completely cover the old (badly-applied) paint. So far, so good…

Sanding, wood filing, priming, and painting aren’t very exciting activities and they can take forever, so you get a lot of time just thinking. Which can be dangerous for people like me, because sometimes I rehash the same thought again and again and again and again…. It’s so annoying to be me sometimes.

What did I think about while working on these cabinets? I thought about the things that I’ve learned, that I’m learning right now, things that I wouldn’t do again, and things that I was glad I took the time to do.

And of course I just had to share them with you. Here we go…

1. Bring the light into the garage.

I can only find the time to work on the cabinets after 6pm and seeing as that it’s winter (summer, hurry up already!) it’s already dark outside by the time I even think about putting on my painting clothes. At first, I just made do with the garage light but I was upset the next day when the paint dried and I could see all the imperfections. So I bought a floor lamp into the garage and it really made a HUGE difference!

2. Don’t put the lamp near the garage door (aka outside, aka where all the bugs are)

I think this one is self-explanatory. I had to quit my priming last night when stupid bugs kept on flying into the light and falling on my freshly primed cabinet and quaking to death. And I think I saw a black widow. Nick killed it. Texas… it’s warm (it was 80 degrees yesterday!), but it’s full of bugs and spiders. Especially in the springtime… Ulkghuuuu. Summer, hurry up already!

3. Inspect used cabinets thoroughly, no matter how much of a good deal they are.

I mean, open the door, look at the shelves, look at everything. The cabinets looked like they were in great shape, other than being dirty and suffering from a bad paint job, so we were thrilled with the price we paid for them ($55 for all three cabinets). But remember what I said about the 1,000 holes? Yeah. They were everywhere. I have no idea what the previous owner was doing with these cabinets! Holes in the bottom, holes at the top, holes at the sides, holes in the doors. All drilled in for some purpose… I think? I filled them all with wood putty, so they should be all covered up and undetectable once they’re all painted, but still! Hours of my life… gone… because of these 1,000 holes.

4. If you use a foam brush with primer, work slowly and with patience (if you have any).

Many blogs say they use a foam brush when applying primer and I always thought, ugh! I tried that before but it didn’t work well. But this time I just didn’t want to ruin another brush with oil primer, so I just looked at a foam brush in its eyes and told it that I would try my best. I took my sweet time and was gentle with that foam brush. And it worked great! And once I was done… throw away! Bye! No washing! Except for my hands… which brings me to the next point.

5. Wear sexy doctor gloves when working with oil primer.

Yes, you can wash the oil primer off your hands with olive oil (true story), but it’s gross and a waste of good olive oil and not really THAT effective. Just wear latex gloves. If you’re allergic to latex, there are latex-free gloves. And if you’re breastfeeding? When the little baby screams for food, you just pull them gloves off and wash the latex reside off your hands and become food! Easy.

6. Just do it. Or you’ll wish you did it… for the rest of your life.

I had a few moments of staring at a hole that I had overlooked and thinking, “I don’t care anymore. Just leave it. Nobody will notice.” This also was my thought every time I saw a little ding here and a paint splatter there. But I just knew I would only see these things and not the things that I did right when they were done and up in the laundry room. Just buckle down and do them. The first cabinet I finished… well, there’s a little ding in there and I completely didn’t see until it was all done. I am pretending that it doesn’t exist (it totally doesn’t exist! it’s not there!) and I refused to make the same mistake with the other cabinets. Thus, all the sanding, wood filling, etc etc etc that I did this weekend.

7. Tack cloths are a gift from heaven.

Tack cloths aren’t new to me, but I really realized how wonderful they are this weekend. I was getting sick of how my tack cloths were getting so dirty so fast that I just tossed them aside and used wet wipes instead and then paper towel to dry up. Then I was ready to paint… but I still could feel dust laying on the wood and smiling up at me. I took a swipe with a tack cloth… ALL GONE. They really do work. If there’s a LOT of dust, I do the wet wipe, paper towel, and then tack cloth. And if there’s a LOTTTTTTTTTTTTTTTTT, I…

8. Just vacuum the dust up. Even if you don’t have a shop vac.

I was getting really frustrated at all the dust that built up in the corners of the cabinet. And when I turned it to paint another side, all the dust would come out and land on my fresh paint job. So I vacuumed it. Ahhh. It’s more fun to vacuum up sand dust than it is to vacuum the carpet. Because I hate our carpet. And I’m beginning to love our laundry cabinets.

9. Putting tape on wood is evil.

I really dislike the person who had the cabinets before us. They put tape on the back of one of the doors and that tape must have been 10 years old or something. There were four pieces of tape and I tried taking them off but the sticky-ness stuck around. I had to sand them off. Sanding worked, but still. Don’t put tape on wood. Please. Thank you. I hate tape on wood almost as much as I hate winter. Can summer please come now?

Well. If you’re looking for me tonight, I’ll be in the garage.

Something new, something old, and something blue…

They’re here!!


Our new washer and dryer are here! Beautiful, front-loading, WHITE machines. Love them. Washing clothes has become fun again! (I wonder how long that’ll last…)

We got them on sale, almost 50% off, thanks to Black Friday. American consumerism, I wuv you.

Our washer broke unexpectedly, so we had to get these new machines. And we sold our dryer on Craig’s List for $40. It was noisy and old. We’ll put that $40 to use in the laundry room.

With the new washer and dryer, our plans had to be tweaked a little. I measured everything out and also measured our cabinets. Since our three cabinets are in three different sizes, I had to think about how to arrange them.

One cabinet is 36 inches long with two doors, one cabinet is 18 inches long with one door, and one cabinet is 24 inches long but only 21 inches tall (the other two are 30 inches tall). So I played with all of the possible arrangements (see the drawings along the right side of the paper).

Originally, I had planned to push the washer and the dryer apart on two sides so there would be space in between for our cat litter. But when I looked at the possible cabinet arrangements, it made more sense to have the empty space on the left side.

Then Nick came up with a great solution for the cat litter (more on that later… want to see if it works out before sharing it with you all), so I changed our plans. We’ll put a small shelving unit there to hold our dirty towels and sheets. Something like this, maybe.

You can see what cabinet arrangement I picked by the very obvious circle. I think it makes the most sense and the door and knob arrangement is the most pleasing to the eye… at least, to Elisa’s eye.

We have plentyyy of space next to the machines, so the next step is to either find an unit to fit in there or make one ourselves. We’ll see…..

Right now, I’m working on sanding away the drippy paint from the cabinets. I’m relieved that I don’t need to buy paint stripper – the sanding seems to be working. I’m not worried about sanding away ALL the paint – just the bumpy parts.

Whoa – how’d that picture of Janella get in here?

Two of the cabinets are sanded down and smooth and ready.

OK, I’d better go and sand down the last cabinet. And prime. And paint. And put them up on the wall. And buy the knobs. I’ll probably only enjoy the knob buying part.

Print, Trace, Paint, and Frame!

The art for our laundry room is complete! But not yet hung. Because… well, we’ll get to that part of the story later.

(click to see bigger)

I love them. Even though I did a bad, bad thing by knocking off “real art.” But I would never be able to afford these art prints and they say imitation is the highest form of flattery. If you’re richer than I am, you can purchase the beautiful prints here. (The shapes aren’t exact – I used the shapes from their previous collection.)

It has been a long journey to get here. Let’s start at the beginning, shall we?

Over a year ago, I wrote a post about art that were DIY-able. Then I didn’t even think about it until just last August, when we decided that we would include the symmetry art in our laundry room plan. Later that month, I fiddled around with Photoshop to make digital images of the symmetry art and finally finished in September.

Then, during a trip to IKEA in September, we grabbed four Ribba frames. You can see my pregnant self trying to decide which size to get for the laundry room – the bigger size or the smaller size.

We went with the bigger size.

I originally thought that we would just get the art printed at a local Kinko’s and pop them in the frames and we would be done. I called Kinko’s (in October) to ask about pricing. This is how our conversation went:

Elisa: Hi, I have a document in color that I’d like to be printed on a 16 x 20 piece of paper – how much will that cost?

Kinkos: That is 7.25 a square foot … and that is 16 by 20 … you re looking at about 21.75.

Elisa’s Brain: Whoa. That’s a lot more than I thought it would cost. Round that off to 22 bucks and then we’ll be paying 88 dollars for four prints?! Too much. Maybe a smaller size would be better? After all, we do have the mats in the Ribba frames.

Elisa: Alright. What about 12 x 16?

Kinkos: Anything above 11 by 17 has to be charged in square footage, so if it s 11 by 17, you could be paying 1.93 a page, but if it’s bigger, then it would have to be done in square footage drawn on an oversized color printing machine.

Elisa’s Brain: Ugh.

Elisa: Okay – for curiosity’s sake, how much would 12 x 16 be?

Kinko’s: 14 … or 15 dollars.

Elisa’s Brain: 15 times 4 is $60. Still too much.

Elisa: Okay, this is great information that you’ve given me, I’ll mull over it. Thanks so much and have a great day.

Elisa’s Brain: No way I’m printing these art prints at Kinko’s. This was supposed to be a cheap project…!

So the plan was changed and I decided to paint them with acrylic paint instead. But I needed a projector to do so and I didn’t have a projector. I could trace them using carbon paper, but I didn’t have any on hand and I wanted to do this as cheaply as possible. This is how I did it…

First, I printed them out in a bigger size. I just copied and pasted the art into a word processing document (I use Pages but you could easily use Word). Then I stretched out the image until it reached a 11 inch-width or a 15 inches length, depending on which came first.

Then I printed them out… in several pieces, and then taped them together. Some of the art only needed two pieces, some needed four, like below.


I put that on top of a large piece of paper that I had cut to fit in the frame. Then I used a pen and pressed hard along the lines of the art, like so:


When that part was over, I was left with indentations on the poster paper:

I penciled in these indentations using a colored pencil in the same color I was planning on painting them with.

Then it was time to paint! I used this set of acrylic paints that I got at Walmart.

All that was left to do was the actual painting. It was easy enough following the lines – I’ve had a lot of practice in my childhood with coloring books, so this was fun for me.

That’s it!

I especially love the visible brush strokes. But you could do a second coat to eliminate the brush strokes, if you wanted.

Oh – the reason why we didn’t hang them up yet? Our washer broke last week… sadface. But we bought it and the dryer off Craig’s List two years ago and they have served us well. And there was a Black Friday deal at Home Depot for front-load washers and dryers, so we jumped on the opportunity to buy a pair!

With that purchase, we are definitely taking our laundry room from blah to ta-da. The timing turned out to be perfect, since we’ll be washing a lot of loads soon when Janella grows a little bit more and fits in her cute cloth diapers.

Laundry Room: Painted! What’s Next?

Thanks to Dad Vita (Nick’s dad), the laundry room is painted! Thanks to Mom Vita (Nick’s mom), the laundry room is spotless! (Please ignore the cat litter in the picture – we have plans for that)

We love the color and we love that it cost us only $2.00 even more.

What’s next? Oh, just a couple of things.

We got this light from IKEA on sale for only $15. It’s a little long, but it works for us because we’re short people not freakishly tall. However, I am still on the fence because I do think it can get in the way when transferring clothes from the washer to the dryer. Plan B for the light is for it to reside in our closet bookshelves.

But the gray color, eh. I want a yellow light! I want to spray paint it yellow. Help me to convince Nick. Hey, Nick, I’m not pregnant anymore. I can do the spray painting from now on. Cool?

Check out our linen shelves. I can’t call it a linen closet when the shelves are so slim and there’s no door, so linen shelves it is.

I asked Dad Vita to not paint the whole thing because this is my vision:

via

We’ll lengthen the shelves so they’re flush to the wall (more storage!) and paint the insides either black or a dark gray. With some trim and cute weaved boxes, it’ll be a linen “closet” I can finally be excited about. I hope we can tackle that soon!

Next to the linen shelves, we’ve got a long wall of nothing. Except for that pretty blue color.

We got four Ribba frames and they’re waiting for me to add the symmetry art I made a while back. I had planned to print them at a local Kinkos and ta-da! But that didn’t work out because of corporate greed. I am one of the 99%! Ah, I will discuss that later, but basically it will be much cheaper for me to just paint it instead of getting it printed. Later, later. Soon, soon.

This wall next to the washer is empty and sad as well.

A friend (Erin!) had this genius idea of putting a fold-able ironing board on the wall, so when we (Nick) need to iron, we (Nick) could just pull the board down and iron away instead of lugging it to the game room. But would we (Nick) appreciate the fact that we (Nick) won’t be able to watch tv (ESPN) while ironing? Hmm, I will need to think (ask Nick) about it.

I LOVE our cats but HATE the cat litter situation. The cats use the litter box just fine, but they track the litter bits everywhere and the laundry room is supposed to be a place where things get clean, so it just doesn’t make sense to have the cat litter there. But there’s nowhere else in the house to put it! So, I want to design something between the washer and the dryer so that it houses the cat litter AND prevents litter tracking everywhere AND is covered up with prettiness. I hope we can achieve all that.

Dad Vita also painted the ceiling… in our usual light gray color. I feel bad for the next owners of the house – they probably will hate our light gray ceilings because most people like white ceilings and grumble about painting all the ceilings. Sorry.

I told Dad Vita that I could tape the ceiling off for him, but he gave me a Look and said that he could cut in just fine. I laughed and said, “Our walls aren’t like your flat walls in Pennsylvania. Our walls are textured and it is impossible to paint in a straight line.” He said something to the effect of “Watch me.”

Well, he was right. His painting job is perfect. Too bad most of the rooms in the house are already painted or I would have postponed his plane ticket back home and asked him to paint everything. His trick: paint the wall paint and let it spill over to the ceiling, and then go back and remove the spillage with a wet tiny brush. Genius. And I can’t believe that it worked.

So. That’s where we are with the laundry room. The next step is to tackle these cabinets.

I will need to sand off the old paint (bad drippage), if possible. I hope I won’t need to buy paint removal chemicals.

Only if this little cutie will allow me to finally tackle this project.