Friday Randoms

Another day, another week, another month. Every time I stop and realize that it’s Friday, I’m amazed at how fast the week went. And then I realize that I haven’t even blogged anything or done anything that could fill out a complete blog post.

Hence, I’m trying something new here. Friday randoms, where I stop and look around and groan at our slowpoke process at making this house our home. Here goes!

The first thing I’m going to do after I finish this blog post is to order this pendant light for our living room:

Oversized Equator Pendant light cb2

I am so excited! I will have to put away a few months’ of spending money to get this, but I know it will take our living room to the next level. I’ve been looking for the perfect light fixture for that room since I wrote this post.

I’m still plugging away on the laundry cabinets… well, I should be honest and say that I’ve abandoned the project for two weeks now. I keep on saying, “It’s too late into the day now, I will do it tomorrow, I WILL!” and then I don’t. It’s the last lap around the track, but when you’ve run 1,000 miles, the last lap is the hardest.

laundry cabinet doors

I will finish it this weekend. I will. I WILL.

After all, the cabinet frames have been completed since April 11.

painted cabinet boxes laundry room

Poor, patient, and lonely cabinet boxes. I’m sorry, guys. You’ll be reunited with your beloved doors soon.

Remember the art I want to work on for our master bedroom? I have several large pieces of plywood in the garage waiting for me to get started on it, but I wanted to experiment on a small piece to make sure that it will look good. So far, I’ve sanded it, added wood filler, and primed it on one side. Next, I will add gesso on both sides and see if the primer is really necessary.

plywood art experiment 1

Once that little project is done, I will update you all and hopefully have a tutorial on how to do DIY art on plywood!

Back to the laundry room – we haven’t put up the art that I made on the wall because we wanted to experiment with templates first and see what layout would look the best. I originally thought we would have the four frames in a grid (two on top, two at bottom), but it didn’t look right with our short ceilings and the second row was too close to the floor. We realized that we were planning to remove the door anyway (to bring in more light to the game room), so we could use the whole wall and line up the frames, side by side.

templates for frames in laundry room

Looks great! We will put them up this weekend. I hope. Sometimes weekends have a way of fooling you on Fridays into thinking that it’ll be long, productive, and full of events. And then on Sunday night, you look up from your laptop when you’re sitting on the sofa and realize you’ve done nothing all weekend. No? Just me? Okay.

Oh, we used wrapping paper to serve as our templates to determine the location of our frames. It worked very well!

Our girl Janella loves strawberries. At the end of a strawberry eating session, she looks like Dexter, according to Nick.

janella loves strawberries

Janella is working on her crawling. She’s not there yet, but she definitely can move forward towards something she wants. However, you need to put the right thing to entice her into crawling/lunging forward. Put a toy in front of her, she will give you a blank look. But if you use a necklace, a working phone (somehow she knows the blackberry I give her is broken), a camera, or a leather purse, you’ll see her move with determination.

I found some redness on her knees, so I told Nick we needed to buy baby legs. But I read in this fun book that I could just cut up some old socks and put them on her legs. I tried that with a pair of argyle socks that I never wear and they look mighty cute on her legs!

baby legs from cut up socks

I’m gonna cut up more socks now. It takes 3 seconds to do – my favorite kind of DIY project.

Oh, and do you see that cute white/gray/yellow pillow in the photo above? Nick gave that to me for my 30th birthday. Love it.

Last AND least, I’m eating this greek dip right now. It’s really good and aside from lots of chopping, it’s ultra easy to make. I mean, if I can make it while entertaining a watermelon-eating baby, anybody can make it.

making greek dip

The end. I wish you all a great and productive (or lazy, that’s good, too) weekend.

Janella’s Birth Day – Part One

Janella’s birth day was a wonderful and amazing day.

Although I hoped for a “oh my gosh the water broke, go to the hospital NOW, drive faster, faster, FASTER!” kind of day, my body just wouldn’t cooperate. On Friday, October 14, I was 7 days overdue and went to the doctor’s office to get checked up. They told me that the baby’s head was so low, if it went any lower it would pop out. They said that everything looked good and my body was ready for labor.

But nothing happened.

By Sunday, October 16, I had enough. I was 9 days overdue. My swollen hands hurt, I was tired of pushing myself off the sofa, and I was constantly worrying that something bad would happen to the baby because it was so overdue – was my placenta aging? Would the baby swallow meconium during delivery? What if the cord was wrapped around the baby’s neck? Every kick the baby made in my belly made me feel better, but every hour that went by without a kick had me paranoid and nervous.

I told Nick that I wanted to call the hospital to get induced on Monday, October 17. He agreed.

He took the day off from work on Monday and I was ready to call the hospital, but I decided to take another long walk with Nick to see if my body would start things. More Braxton Hicks contractions, but none of the real thing.

I sat down to call the doctor, but I decided to check my email first. I got an email from the doctor’s office saying that they had booked me for induction for the next day at 6:30 AM, but it was up to me whether to go with the induction or wait it out until Friday.

I was so thrilled to get that email – there was no way I was waiting any longer to meet our sweet baby!

We spent the rest of the day getting the house ready and rested a lot.

That evening, I rummaged through the closet and pulled on the last clean shirt that would still fit me and my belly.

We went out for dinner that night… nothing says “We’re ready for Baby!” like a plate of pork and a baked potato…

Except for a plate of great steak and a baked sweet potato!

Full but relaxed, we climbed into bed that night excited and happy.

6:30 AM couldn’t come any sooner!

It’s hard writing everything down with a newborn that’s clamoring for my attention (or the food bags on my body) every few hours, so I will have to write this story in parts instead of waiting until I finish, which might take days to do! Come back soon for Part 2.

Paranoia + Procrasination = DIY Window Curtains

You know sometimes when you’re so scared to try something that you procrastinate in the hopes that someday you’ll wake up feeling confident and knowledgeable and ready to tackle that something with skill and dexterity? That’s kinda what happened with the fabric that we got for our nursery curtains. It quietly sat in the closet of our guest bedroom, waiting for me to overcome my fear of cutting the fabric wrong and having horribly crooked curtains and disappointing my mom who bought it and embarrassing our baby who would have to sleep in a room that was decorated by an obvious amateur.

I didn’t wake up one day feeling confident and knowledgeable, but I did wake up one day feeling that I couldn’t put it off any longer because I couldn’t paint anything and I was feeling pretty useless. So I took a deep breath and laid out the fabric on the floor in the kitchen and told myself to just CUT THE FABRIC and it would all turn out to be okay, hopefully, in the end.

Too much prose for a simple set of curtains? Perhaps. But I’ll show you how I cut it and how I “hemmed” it, in the hopes that this post will help at least one paranoid, procrastinating person out there.

I measured the full length of the wall in our nursery, which came to 93 inches. I then added 1 1/2 inch to the top and to the bottom = 96. I even asked my math teacher husband if I did the math correctly. I have a history of bungling seemingly simple measurements (the reason why our closet bookshelves are not YET done), so Nick has politely requested that I run all numbers by him.

After laying out the fabric on the kitchen floor, I measured the length on both sides and used a L-ruler to make the marks. The L-ruler gave me some security because I figured that the L would line up with the side of the fabric and thus my marks would be straight across the fabric.

Then I marked the whole length of the fabric, holding my breath all the while and hoping it would be straight. I guess it all worked out and all the cuts were okay, even though I did throw a mini-tantrum at the last cut when my markings were completely crooked and off. Luckily, since I would hem the top and the bottom anyway, my messed up markings didn’t matter.

Next up was to actually hem the fabric. I used iron-on hem, which I recommend if you have a sewing machine that has been in its box for the past four years. I did the sides of the fabric first, which gave me some more confidence since there is a clear border on the sides which I followed when folding over the fabric. Before hemming, I ironed the fold so there would be a crease for me to follow. Then I just put the hem strip and ironed over it for two seconds, let it cool, and peeled it off. Fold over the fabric and iron again, for 6 to 8 seconds, resist the urge to pull on the fabric to test if it sticks because it won’t stick until cool, and then you’re golden. It was pretty easy, but time consuming. Luckily we were watching Dexter while I was doing this, so I wasn’t too bored.

After the sides, it was time for the top and the bottom. I did the top first in the same manner, with a little more paranoia because there was no clear border to follow, but I just eyeballed it and it turned out fine. Then I hung the curtains up and pinned the bottoms until they pooled on the ground just a little bit (I hoped this would hide any imperfections in my hemming) and took them back to the ironing board.

Since the bottoms of the curtains had more fabric to fold up, I decided to do a double-folded hem. Does that term make any sense? I’ve already blathered on for too long on this post, so I will let the photos do the talking and you can see how I did the double-folded hem on the bottoms.

The curtains look great and I’m surprised that they look so good! SO RELIEVED. Even though it took forever, I feel motivated to do curtains in the other rooms in the house! I’m not too sure if making curtains is much cheaper than buying curtains – the costs seem to be similar in the end – but it’s nice to get the exact fabric that you want instead of settling on what is available out there.

It is so hard to photograph the curtains with the light shining out of the window – I tried my best with our little point and shoot. (If you have any tips, let me know!)

I plan to get a white roller shade with blackout shade on the window and perhaps add a fun orange ribbon on the roller shade.

The lesson here, at least for me, is to stop worrying about perfection and just do my best and it’ll be OK in the end. If not, it’s not exactly curing cancer, so I need to just chill. Right? Right.

Fabric: Covington Wilmington Multi.

Linking up to the Window Treatment Challenge at the CSI Project!

In a perpetual state of progress.

You’re welcome to come and visit our home sweet home, where you’ll find uncompleted projects strewn about.

Towel hooks for the bathroom primed but not painted yet. We decided to go white instead of yellow once we saw it primed. Yep, we’ve got some left over white spray-paint, perfect, perfect. I’m banned from spray-paint because of the little shrimp in my belly, so honey, can you do it sooner than later? After you do the cat litter, the dishes, the drilling, and the massaging. Love you honey, at least your body won’t be ripped apart in a few months, don’t complain.

A hanging all painted purple and happy, but sad to be hiding under our dresser, waiting for it’s time to shine above our bed. What’s the hold-up, you ask? We want to play with our room arrangement first before adding another hole to the wall. So, my little purple sweetie, you’ll remain hidden until… Who knows when?

Three RIBBA frames all ready, waiting and waiting and waiting for some homemade art. Darlings, you’ll be waiting for some time… Hate to tell you this, but it’s probably the truth. We’ll try our best, but I predict this will be a summer project, after school’s out. Until then, we toil away in our classrooms by day and lounge at night.

Our poor little exercise room, being used as a giant tool box, now going through some identity confusion. You’re a guest bedroom now, little one, you’ll have sweet people sleeping in you instead of sweaty people trying to get in shape. The good news, my dear, is that you’ll have a makeover sooner than you would have if you remained an exercise room. Next decision: green or blue, blue or green? I think blue…

Bathroom cabinets painted on one side, let marinate for five days, turn over, lovingly caress the other side, let lounge for another five days, realize you should have painted the front side last, turn it over a little angrily this time, slap on another coat, grumble for five days, and then realize that they need some drillin’… almost there, almost there, almost ther….

The project that will never end. After months of priming, painting, priming and painting all the supports and shelves, it’s finally installation time. After testing out some anchors and figuring out where the studs are, the first support was installed. After this successful run, the plan is to purchase lots and lots of anchors and get to drilling. After that… lots of little steps, such as filling in the screw holes with wood filler and painting over it. Oh, joy, joy, joy!

But there is a small bright spot of joy in our house… very, very soon, we will have the first completed room in the history of this house! Our bathroom is practically finished, except for the towel hooks and the cabinet knobs I whined about earlier. So excited about this – photos will be shared by Monday, for sure. We’ll be done by then, for sure. For sure. For sure.

But the shelves won’t be done. They will never be done. I didn’t realize how hard it is to style shelves, wow. At least there’s a cute bird on it. A bird, you ask incredulously. Hasn’t it been done? Yes, probably, but it is cute. And I don’t have any other animals in the house, except for two real cats and a bison, so I think we’re allowed.

And when I showed Nick this post, he said that he thinks we can complete everything by Monday morning. Ah, I married an optimist!

The Bedroom Nightstand Saga Comes to an End… Almost.

I can’t believe that our struggle to find nightstands for our master bedroom took almost a year!

In May 2010, we almost got nightstands off Craig’s List but backed out when we found that they weren’t solid wood. We decided we wanted campaign nightstands instead.

But we couldn’t find any on Craig’s, so in October 2010, I came up with some ideas to hack the Rast nightstand and decided that I wanted to do them Dorothy Draper-style. But we didn’t get a chance to go to IKEA. Nick We kept on putting the trip off.

Then in February, we hit up a couple of new-to-us thrift stores. One of them was called Next to New. The north Austin thrift store has a nice selection of furniture, frames, clothes, and appliances and a pricing system that I hadn’t seen before:

IMG_0315

Basically, they tell you WHEN the price will drop. Of course, the risk is there that the item will be gone before the prices drop, but it’s a great idea! This price is for a beautiful, large campaign dresser that could be used as a TV table.

As Nick was ogling this dresser, I walked around and found two campaign nightstands! We considered waiting for the prices to drop, but we didn’t want to risk it and just bought them! I think we paid $70 for the pair.

IMG_0326

The cool thing about these nightstands is how the top drawer opens up like a secretary desk.

IMG_0328

Plenty of room for all the books that are threatening to take over our house!

It’s funny how our plans went full circle and we went back to our original plan. We plan to paint the nightstands either a light gray or white and maybe spray the hardware to be darker. Hopefully the result will look something like this:

lonny, feb/march 2010 issue

At least, I was thrilled that someone tried the Dorothy Draper hack on the Rast nightstand and it turned out fabulous, just like I thought it would!! Check it out here. But I’m sure you all have already seen it while I was in my pregnancy haze.

October: Productive and Unproductive

There’s still one more week left in October and it’s already feeling like the longest month of 2010.

We packed up and flew to Philadelphia…

…where we found the orange table. Then I got advice from dad-in-law Tony about the closet bookshelves and learned that the saying “Measure twice, cut once” is wrong. It should be “Measure twice, ask dad-in-law for advice, THEN cut once.”

He invited me to look under his DIY shelves in his linen closet…

…and I decided to slash and burn change our closet bookshelves plan.

We arrived back home to this…

…and I developed a new plan for the bookshelves and marked my measurements in chalk…

…and stared and stared and stared some more at the existing closet shelf…

…thinking, “Should we rip that out? Would that cause damage? But if we leave it there, would it stick out like a sore thumb due to its weird supports that were designed to hold clothing rods? But what if we sell the house? Would it be better to leave it in so the next owner can use it as a closet? But should we suffer with this weird thing for as long as we live in this house, which might be ten years or more? But but but…”

Then our trash can popped its lid and we finally replaced it with a fancy trash can.

And then we were off on another plane, this time to Florida for my step-sister-slash-cousin (yep) Allison’s wedding! While on the plane, I read my favorite stupid magazine, SkyMall, and planned to snap photos of funny and dumb products for sale…

…but then Nick stopped me and told me that I was the dumb one. So I stopped. And we arrived just in time to grab a Five Guys burger and hightail it to the wedding to see Allison being beautiful…

…then arrived back home two days ago and got back to our closet project.

Yep, I tore it all down. It felt great. With some sanding and paint, we’ll be back on track with this project!

With no more out-of-state trips coming up anytime soon (we’ll be hosting Thanksgiving this year!), I hope to seriously check off some things off our list before 2011 comes and attacks us all.

P.S. Santa, I want a new camera for Christmas.

Countdown to Cancun!

We just bought tickets to Cancun for June 15! We will be traveling the Yucatán part of Mexico and parts of Central America for five weeks. I really can’t wait for this adventure that we’ve wanted to do for several years!

However, leaving the country with uncompleted projects lying around doesn’t sound very appealing to us. So, we’ve banned ourselves from starting ANY new projects until after we come back from our five-week adventure.

We will definitely be MORE focused and motivated to FINISH all the projects that we’ve started so far. We will have… what… nine weeks to finish everything. Gulp.

Check out our Countdown to Cancun to-do list on the right side of this blog. We’ll be crossing things as we go… Wish us luck!

You’ll see that one thing on the list is crossed off already. We got a head start last weekend when we painted the first coat just before we flew off to Iowa for my step-brother’s wedding last weekend. We’ll paint the second coat and the gray borders this weekend. I wish we could tackle that tonight but I’ve got stacks and stacks of papers to correct since grades are due this Friday!

Our cats model our painting progress (they insisted):

Bad News and Good News

Painting furniture is HARD.

Remember my jewelry drawer project? Not finished.

I did make progress, though! But the deadline was yesterday.

I say what? NO. I am not showing you what has been completed so far. It looks horrible and I think I will have to redo everything.

Maybe with spray paint. Definitely not gloss paint – it shows every beginner’s flaw. I don’t know, I will figure it out…..! I hope!!

I did get these CUTE drawer knobs, though —

drawerknobsFrom Anthropologie.

Yes, the same store I found this very cute orange chair that Nick didn’t like.

But good news!

When we were at the store, the chair was sitting there, smiling up at Nick. He sat in it. He had a straight face on.

I asked, “Do you like it?”

He smiled. “Yeah.”

It looks even better in person!

That makes me so happy that I almost forgot that I failed at my project. Almost. Ah.. I WILL FIX IT AND SHOW YOU MY SUCCESS. (even if it takes me months)

Meanwhile – if you’re hungering for some great before and afters by people who actually succeeded at their procrastination projects, click here.

Photo of drawer knob from here.

Framing the Boob Tube

We admit it, we love a good TV. That little box shows everything from violent football games to thought-provoking movies to mind-numbing reality tv shows. On a trip to an outlet Sony store, we bought a 42-inch flat-screen TV on a whim (it was too good of a deal to pass up) and we love it.

But a thing of such beauty needs to be surrounded by beauty.

We looked and looked for a nice tv set that we would be happy to look at everyday…

We went to many furniture stores but a lot of tv sets looked too boring or too old-fashioned, but most of them was just plain BORING. They looked all the same.

Until we saw the perfect specimen at IKEA. {Oh, IKEA, people say that you’re cheap and low-quality but we disagree – you’re modern and fun and well-priced. Of course, you have some furniture that should be only seen in college apartments, but you have some great items, too.}

fab.

fab.

Immediately, we said, THIS IS THE ONE. Love at first sight. The lights at the top! The sliding doors! The pictures inserts on the cabinet doors!

But it was out of stock. For weeks! We kept on calling and calling and waiting until it came into stock and in the black color we wanted. Then finally, o happy day, it came into stock and we zoomed over to Round Rock and made the big purchase.

SO EXCITED! CAN’T WAIT TO PUT IT UP!

And then we waited weeks and weeks before we finally put it up. Sometimes I just don’t understand ourselves.

pawprints.

pawprints.

Here’s what our “tv wall” in our living room looked like before. Old IKEA tv set from my old apartment, the beautiful tv, and a cool vase of golden straws (a cool wedding gift from Nanette). You can see our cool bluish-gray paint on the wall.

eh

eh

Ok, on to work. First – untangle all the cords behind our tv. We have lots of cords that are like 10 feet long when we only need like inches long. Really smart, I know.

the wolf and the cowboy

the wolf and the cowboy

After pulling our cats out from the tangle and throwing balls in the direction of the dining room so they would leave us alone, we got back to work. Anytime we do anything around the house, the cats think its time to play.

Elisa and Nick painting the walls? Let’s jump into the paint tray and get paint all over ourselves! NO NO A BATH?? NOOOO!!

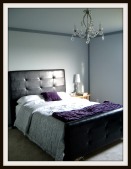
Elisa and Nick assembling a chandelier for the bedroom? Let’s play with all the diamonds and little things and chew on them!!

Elisa falling asleep on the bed with the laptop still on? Let’s play with the keyboard and destroy it! (Three of my keyboard buttons are still missing… I suspect they’ve been swallowed by the troublemakers.)

Anyway.

blank canvas.

blank canvas.

DSC02941

hard at work.

The tv set is actually different pieces stacked together. Later, we will get screws and whatnot to secure everything together.

Later.

Finally, we’re done…

Top Model Nick

Top Model Nick

For now.

still a long way to go.

still a long way to go.

Things we still have to do:

– Put in screws and a tv mount (we already have the tv mount) into the tv set so we can hang the tv (you still can see our old tv set in front of the new tv set, holding the tv. it’s so dumb – I have to hold the remote really low for it to connect with the DVR).

– Put in sliding doors

– Put in shelves

– Purchase two cabinet doors and put art in them, like the model at IKEA

– Buy a lotta more accessories

– Add lights at the top of the tv set to shine down on the accessories

– Take pictures and blog about it

bright happy o' new day

bright happy o' new day

We like how it looks now! We will have to decide whether we want to add another level to the top of the tv set… We loved the three “levels” on the model at IKEA, but our ceiling is just three inches too low for the third level. Frown. We could get a smaller cabinet to put on the top for a more built-in look, but right now we’re thinking about just adding more accessories, like vases and plants, on the top to balance everything out.

I also want a giant green plant on the right side of the tv set (near the window). But the tiny plant I got got destroyed and eaten up by the cats. And I basically killed an unkillable cactus somehow (I think I have a bluish-gray thumb, not a green one). So we’ll see about that…

I Like Shiny Things

this pic doesn't do it any justice

this pic doesn't do it any justice

I am posting this in the hopes that it will SPUR me and Nick to assemble this thing and put it up in our living room!!!!!!!

Right now, it’s in this box:

it's looking at us, waiting...

it's looking at us, waiting...

It’s so sad, I know.

Then look for a cute lighting for our dining room. We want something like this:

purty.

purty.

But without the $400 price tag.

Right now, the chandelier that came with the house is disabled. Handicapped. Lopsided. Limping. Off-balance.

After knocking it against our hard foreheads one too many times, one of the lights met its demise after a particularly hard encounter with Nick’s head.

Which isn’t a sad story. It’s a happy one. Because that’s more ammo for me to use to convince Nick to purchase a new dining room chandelier sooner than later!

Don’t tell him I told you this.